Moving from Wix to WordPress requires rebuilding your website because Wix has no full-site export option.
Wix sites must operate on Wix’s own servers, so you transfer supported content manually or through available import tools.
You can import some blog posts and export eligible store products, but pages, designs, menus, and Wix app features need to be recreated.
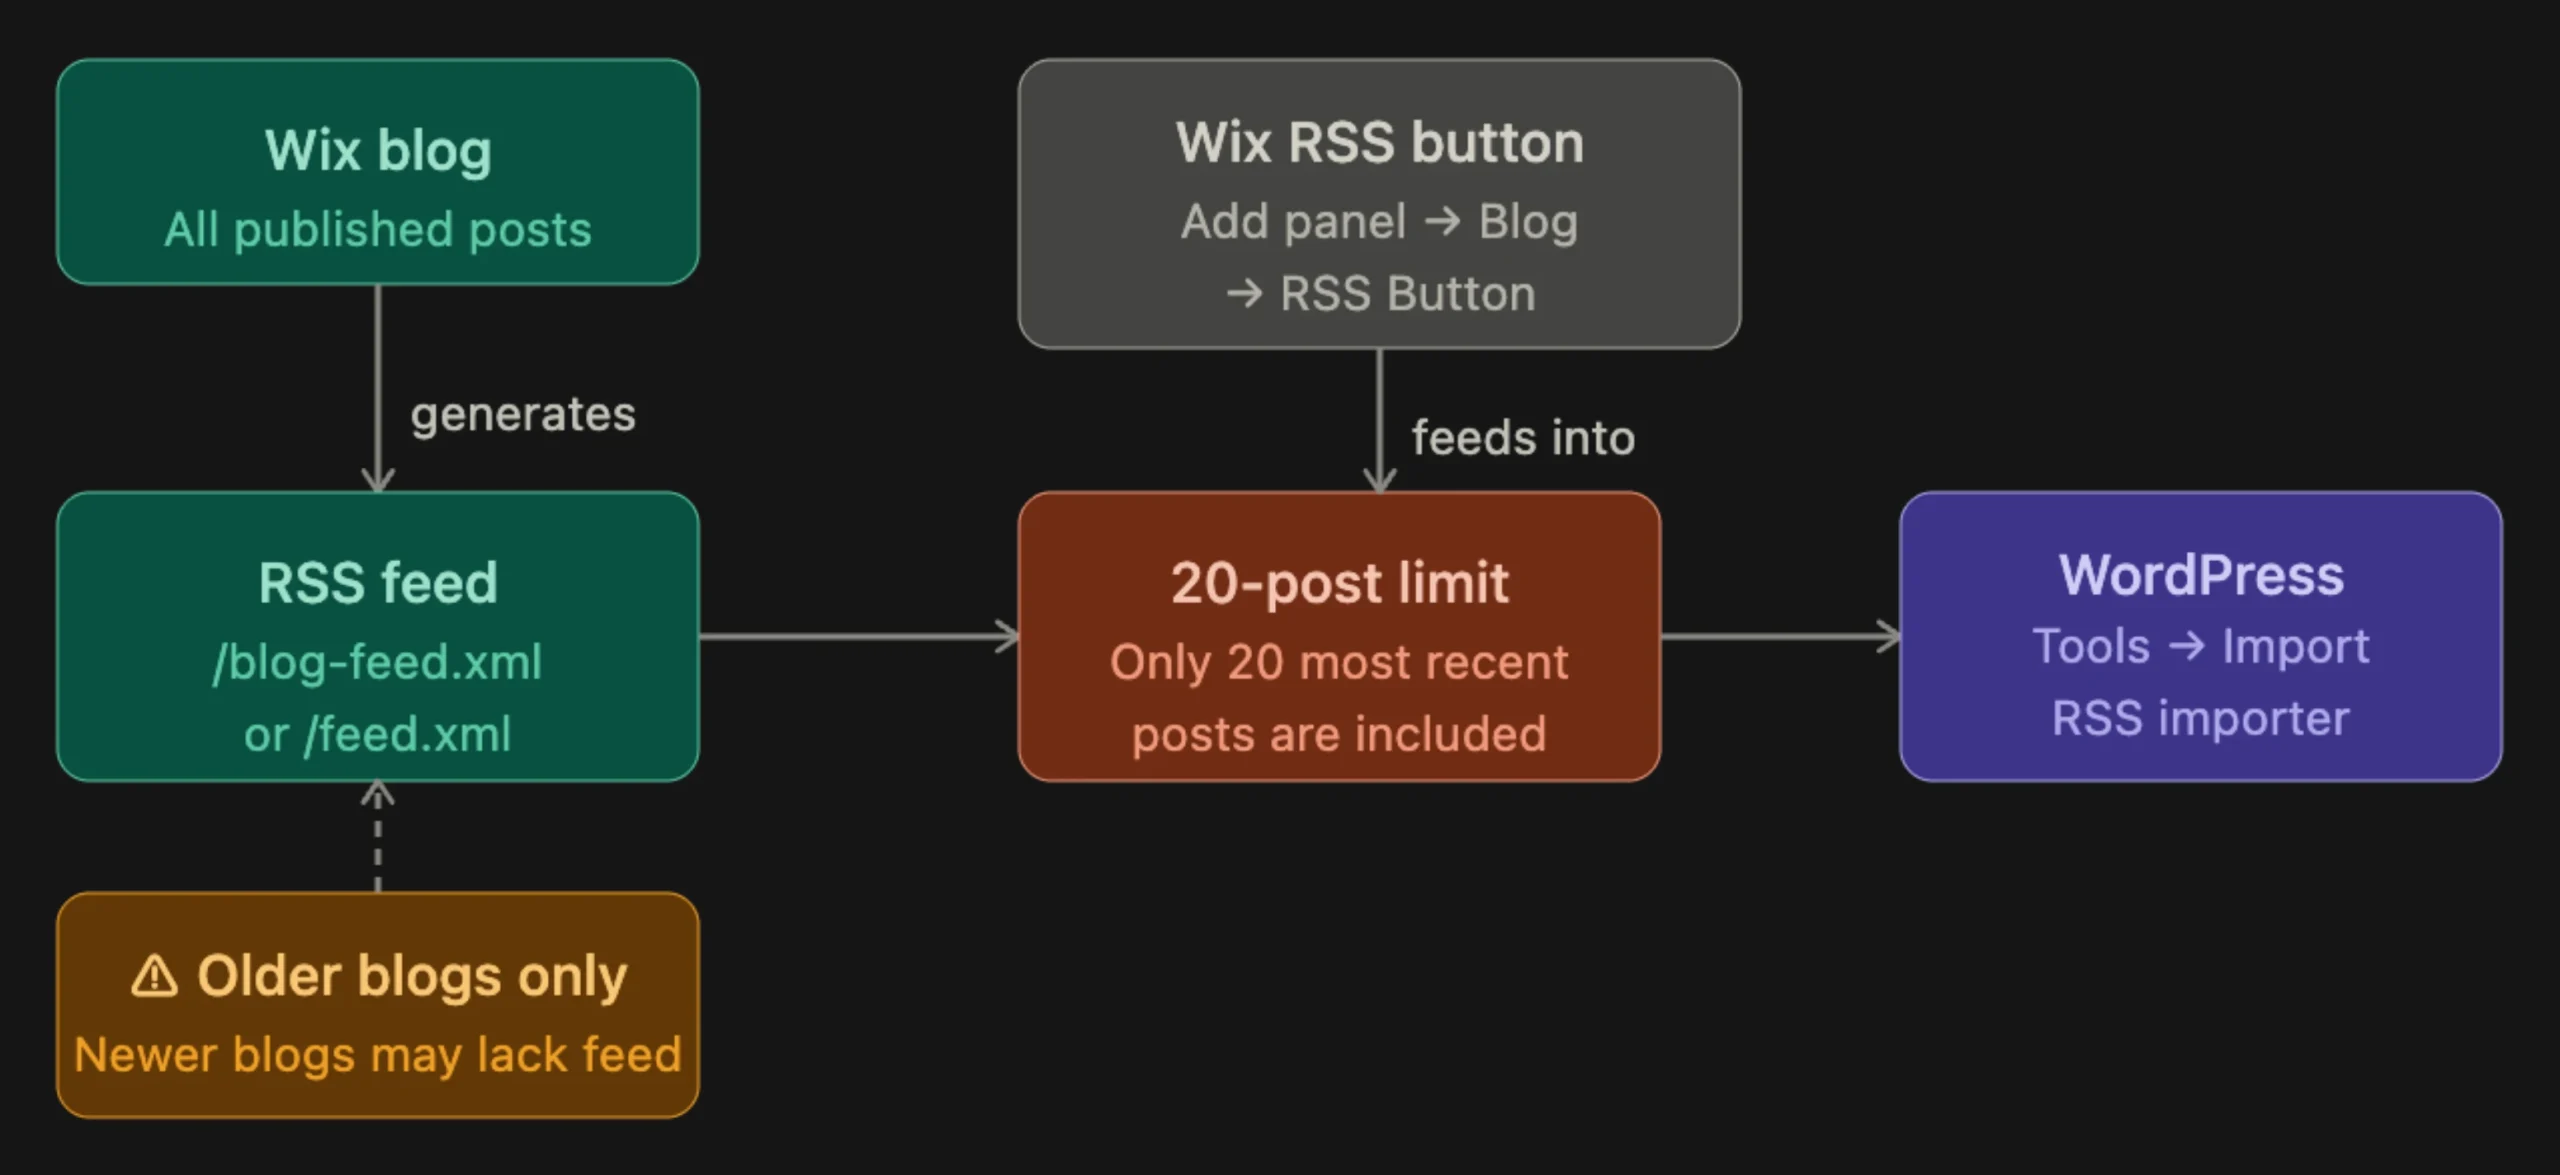
The standard RSS workaround imports only the 20 most recent blog posts.
This guide covers the steps to move your content, domain, and email while keeping your Wix site running until the new WordPress site is ready.
Steps to Move from Wix to WordPress
1) Prepare Your Wix Site for Migration
Before you start rebuilding your website, take a little time to check what you already have. This makes it easier to track your progress and reduces the risk of leaving important content behind.
Start by listing your existing pages, blog posts, images, navigation menus, and store products. If you run a business website, include contact forms, booking tools, galleries, and other features visitors rely on.
Next, check where your domain is registered and identify your email provider.
If you use a business email address, save your current DNS and MX records. You’ll need these details when you switch your domain to the new website.
It’s also worth checking if your Wix blog has an RSS feed, as this determines if you can use the available import method for your posts.
Finally, back up any content and data you can access.
Keep your Wix website running throughout the migration so visitors can continue using it while you work on WordPress.
2) Get WordPress Hosting and Install WordPress
WordPress is free software, but you’ll need web hosting to make your website accessible online.
At Truehost, we offer WordPress hosting through our Starter, Pro, and Unlimited plans. Starter and Pro include free automated SSL certificates, while some annual plans may include a free .ug domain. Check the current plan details before purchasing.
| Plan | Price | SSD Storage | Websites |
|---|---|---|---|
| Starter | USh 14,248.00/month | 30 GB | 10 |
| Pro | USh 10,650.38/month | 50 GB | 30 |
| Unlimited | USh 100,412.78/month | Unlimited | Unlimited domains |
All three plans support WordPress and other content management systems. Starter and Pro also include a website builder, website templates, and Python and Node.js support.
The Unlimited plan includes unlimited databases and FTP accounts, supports multiple CMS platforms, and offers 99.999% uptime. Its backup provision specifies five days of incremental backups.
Once you’ve selected a plan, activate your hosting account and open its control panel. If a one-click WordPress installer is available, use it to install WordPress on your hosting account.
For now, leave your domain pointed to Wix. You can build and test the WordPress version before making the new site visible to your visitors.
3) Choose a WordPress Theme and Configure the Basics
Since your Wix design won’t transfer automatically, you’ll need to choose a WordPress theme and recreate the appearance of your website.
Select a theme that suits your website’s purpose. A business website may need a clean layout with clear service pages, while a blog may benefit from a design that makes articles easy to browse.
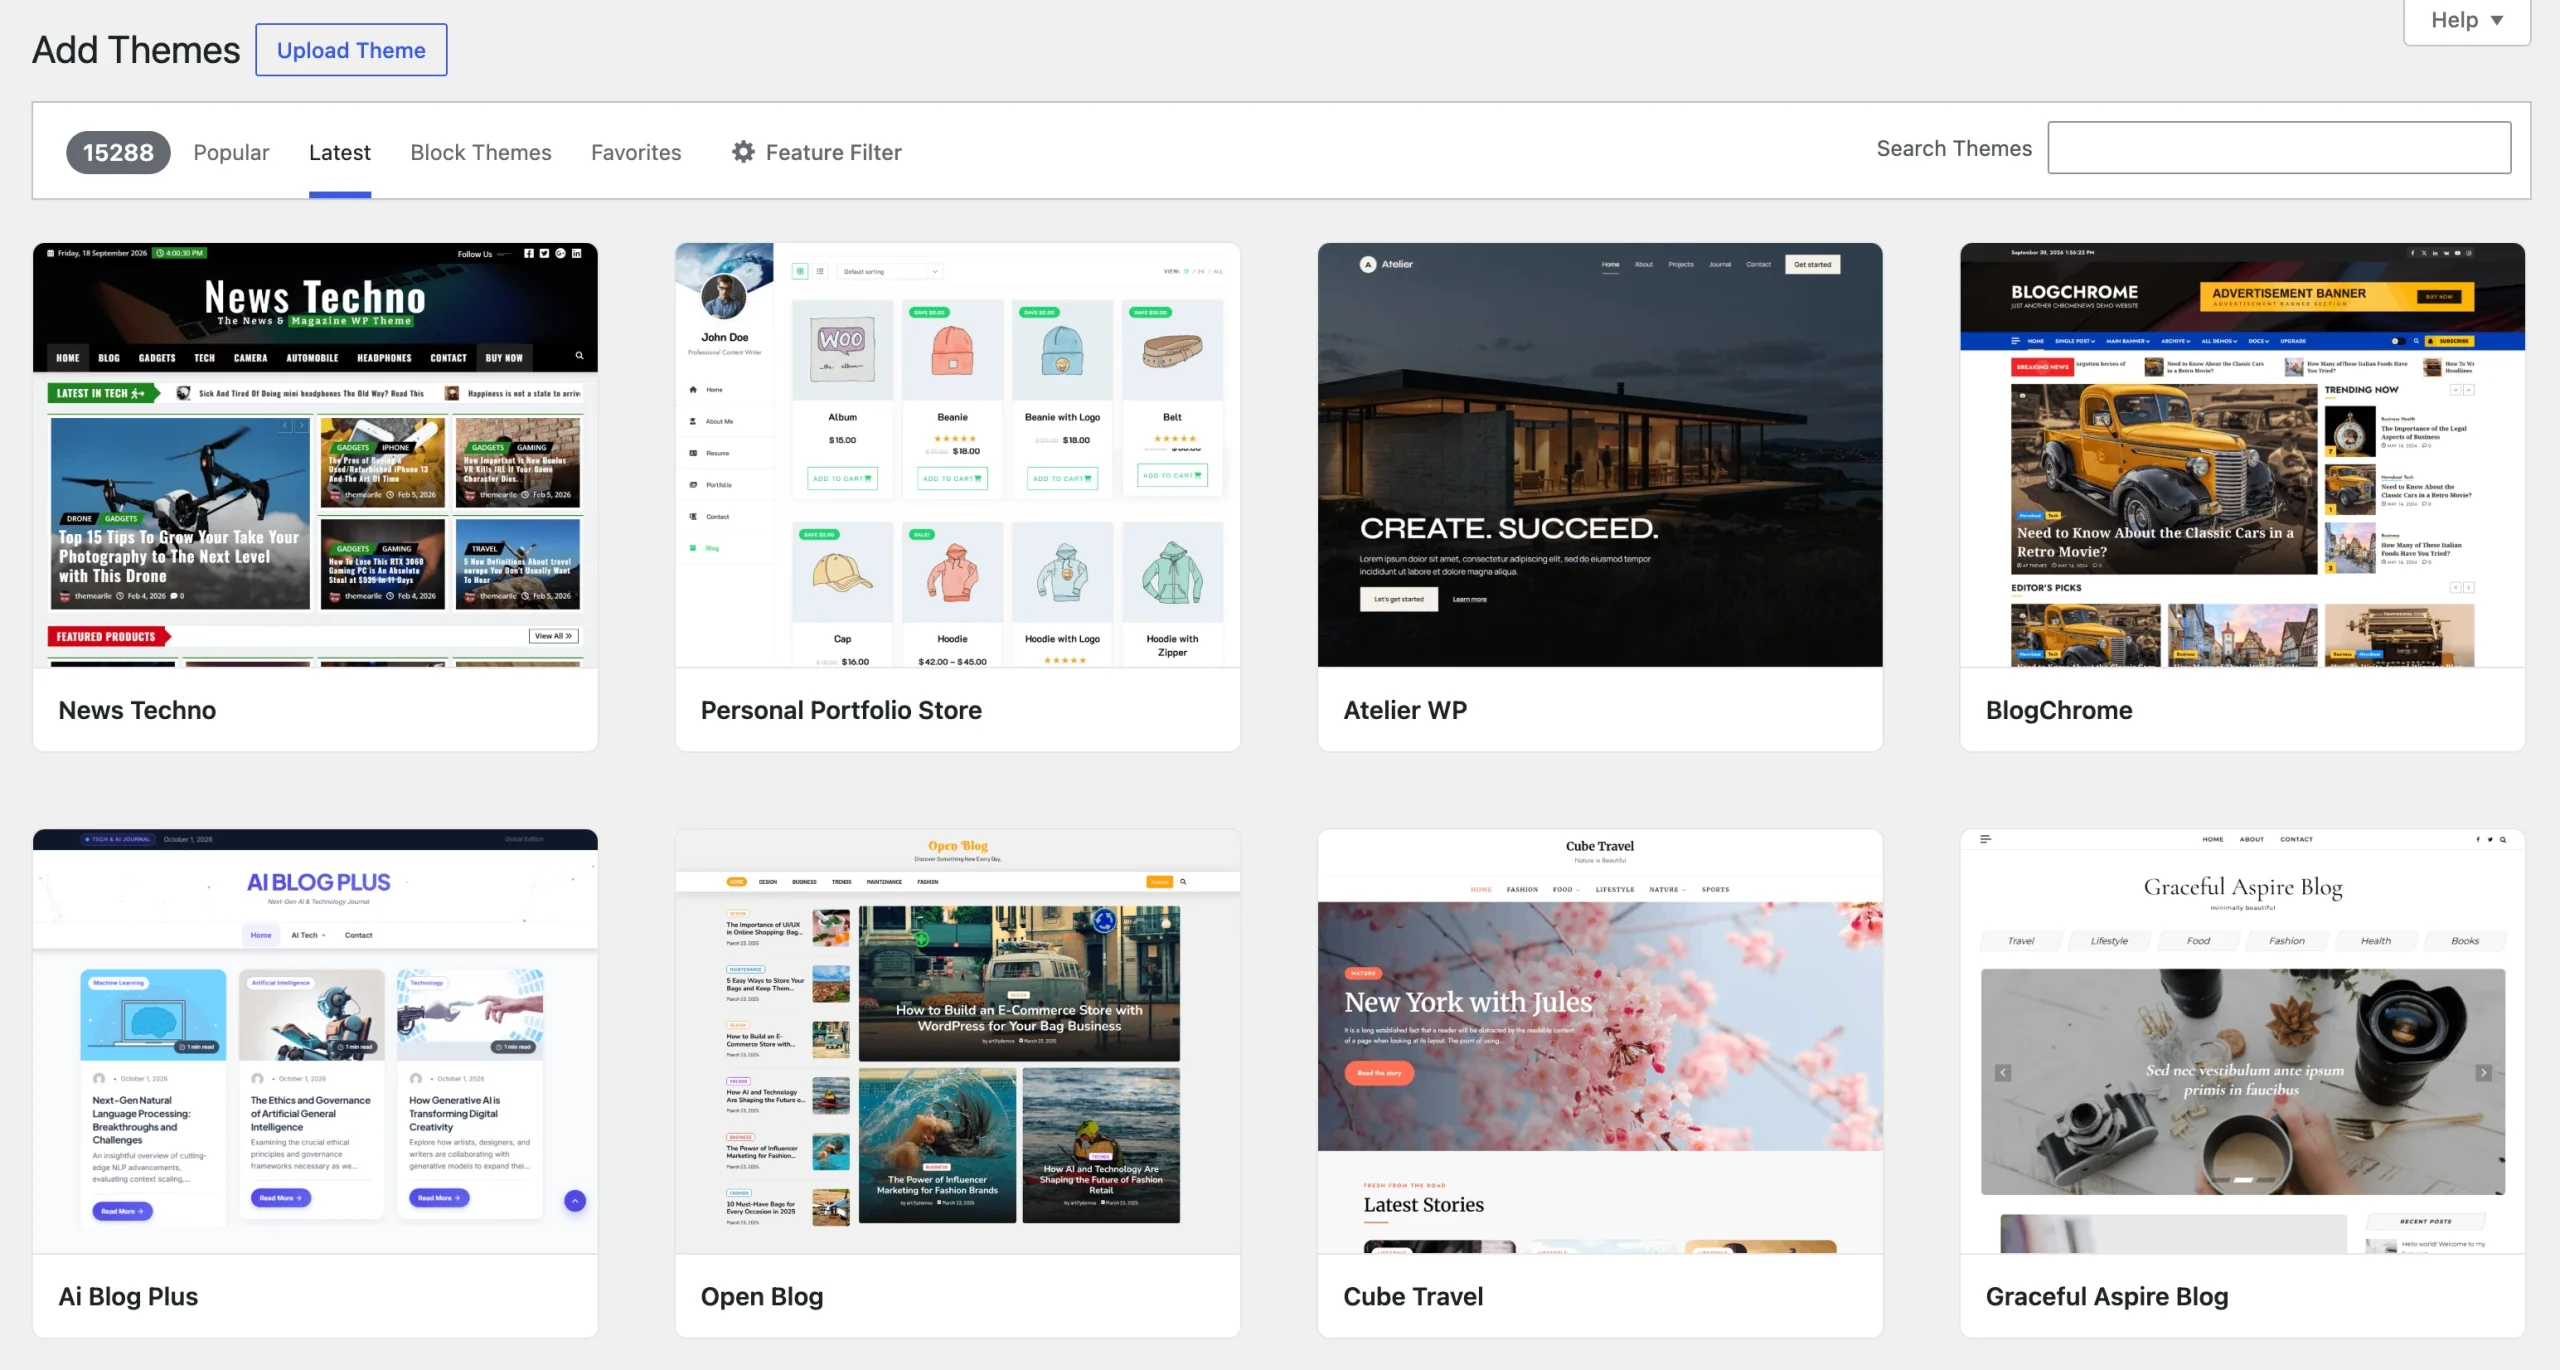
Recreate your branding by adding your logo and setting your preferred colors, fonts, and page layouts.
You don’t have to reproduce every detail of your Wix design. Focus on making the new website familiar to existing visitors and easy to use on both desktop and mobile devices.
Before importing your blog posts, open Settings, then Permalinks in your WordPress dashboard and choose your preferred URL structure. Keeping your new URLs as close as practical to the old ones can make redirect management easier later.
You can also install the plugins you’ll need for contact forms, image galleries, bookings, or other features that were part of your Wix website.
Keep the initial setup simple. You can refine the design after your main content is in place.
4) Move Your Blog Posts
If your Wix website has a blog, you may be able to import some posts through an RSS feed. However, this method has limitations, since the standard workaround imports only the 20 most recent posts, and newer Wix blogs may not support the built-in feed it requires.
To import posts through RSS:
- Try opening your Wix website’s RSS feed by adding
/blog-feed.xmlor/feed.xmlto your domain. If a feed is available, save its contents as a file in a format the WordPress importer accepts. - In your WordPress dashboard, go to Tools, Import and install the RSS importer if it isn’t already available.
- Run the importer and provide your saved feed file.
- Open Posts, then All Posts, and check which articles were imported.
The exact process may vary depending on your Wix blog setup and the importer version. If neither feed address works, you may need to transfer the posts manually or use another migration method.
Fix imported images:
An imported post may still load its images from Wix rather than your new WordPress media library. If you cancel Wix before dealing with these external image links, some images may stop displaying.
You can use a suitable image-import plugin, such as Auto Upload Images or Import External Images, to help bring externally hosted images into WordPress.
Check that the images have been saved to your new site and display correctly before removing your Wix website.
Move the remaining posts:
If you have more than 20 blog posts, or your RSS feed isn’t available, copy the remaining articles into WordPress manually. Start with posts that attract the most visitors or support your main business services.
As you transfer each article, check its headings, links, formatting, featured image, and publication date. This gives you an opportunity to correct outdated links and improve the reading experience while keeping the original content available.
5) Rebuild Your Website Pages
Your regular Wix pages won’t transfer automatically, so you’ll need to recreate them in WordPress. The easiest approach is to work through one page at a time.
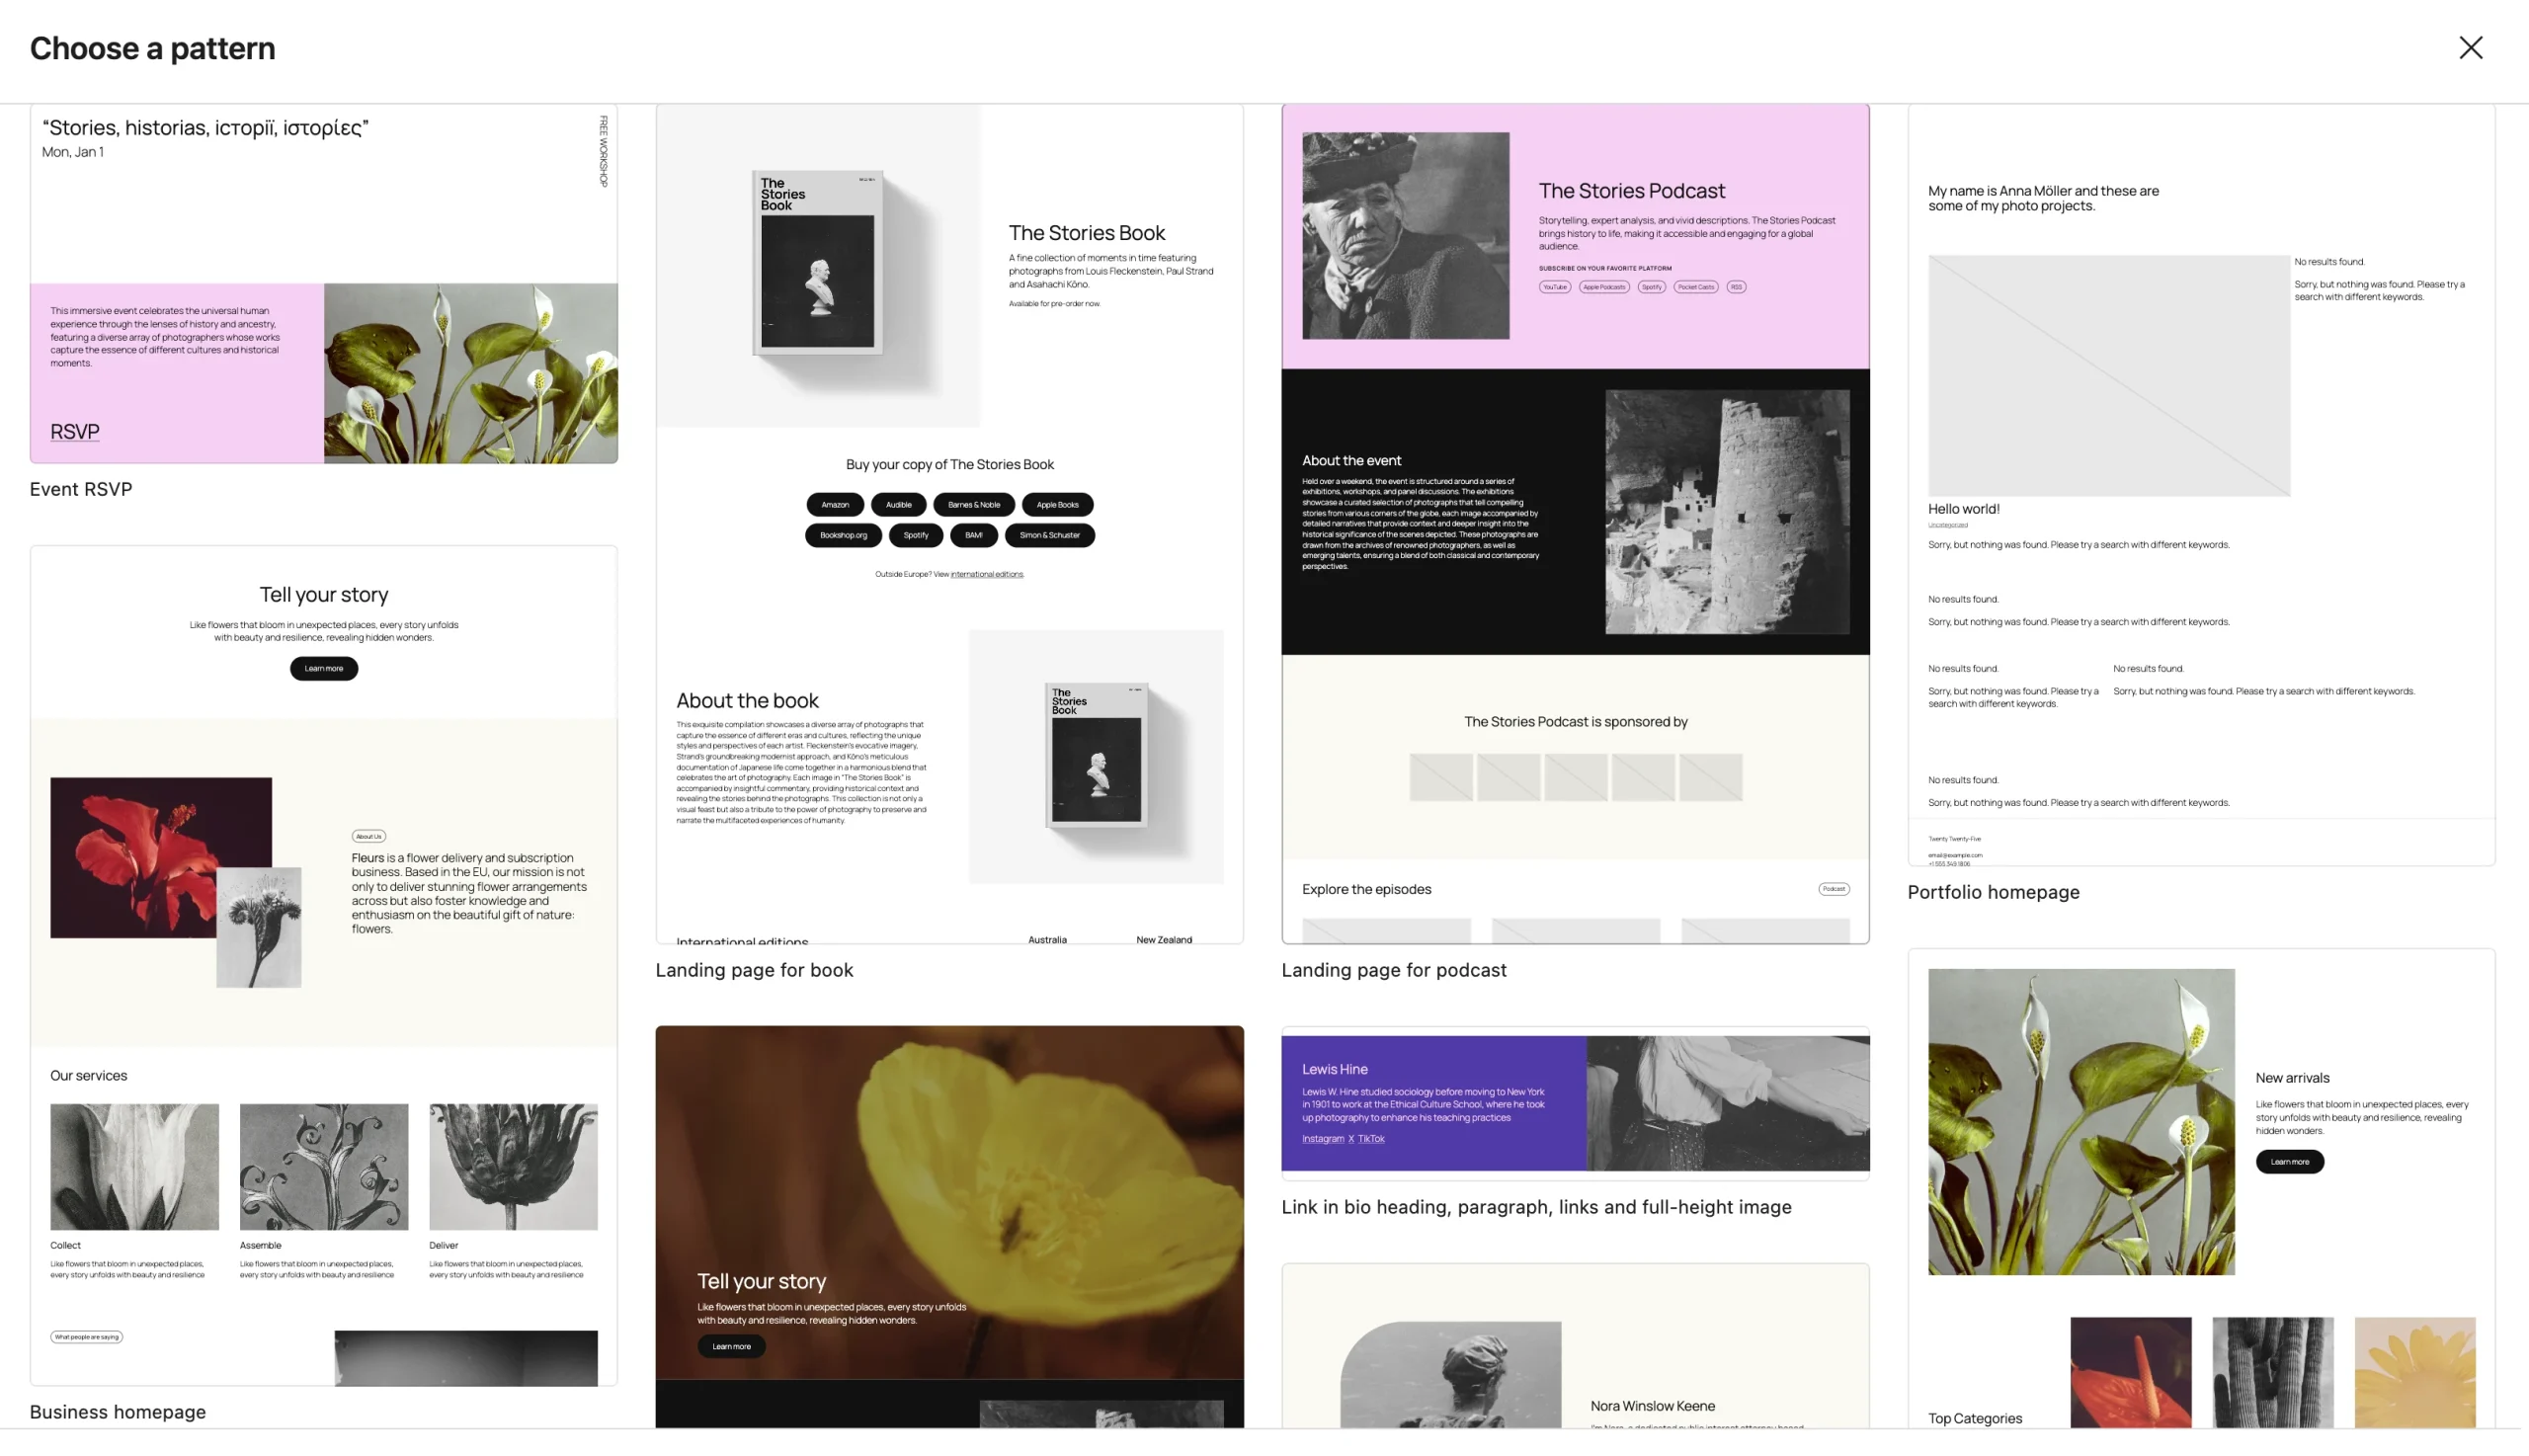
- In your WordPress dashboard, go to Pages, Add Page, and choose a page pattern, possibly something close to your equivalent Wix page.
- Copy the text from the corresponding Wix page and arrange it using the WordPress editor.
- Download the images you need from Wix and upload them to your WordPress media library.
- Recreate contact forms, galleries, booking functions, and other features using suitable WordPress plugins.
- Publish the page and test it on both desktop and mobile devices.
Start with your homepage or your most important service page. Once you’re happy with how that page looks and works, use the same process for the rest of your webpages.
Pay attention to the small details as you go. Check that buttons lead to the right destinations, images have appropriate dimensions, and contact information is current.
If your Wix website uses apps for bookings, events, or other specialized functions, you’ll need to find suitable WordPress alternatives and configure them separately. Copying the text and images alone won’t recreate those features.
6) Move Your Products to WooCommerce
Skip this step if your Wix website doesn’t have an online store.
If you sell physical products, you can export eligible products from Wix and import them into WooCommerce, the popular e-commerce plugin for WordPress.
Export products from Wix:
- Open the Products section in your Wix dashboard.
- Select the products you want to export.
- Open More Actions, Export, and download the CSV file.
Wix supports up to 5,000 rows per export file, but its standard product export does not include digital products. If you sell downloads or other digital items, arrange a separate method to transfer those products and their associated files.
Import products into WooCommerce:
- Install and activate WooCommerce on your WordPress website.
- Go to Products, All Products, then Import.
- Upload your Wix CSV file and continue to the column-mapping screen.
- Review the suggested mappings and correct any fields that WooCommerce hasn’t matched properly.
- Run the importer and check the imported products when it finishes.
Use a UTF-8 CSV file and back up your WordPress site before importing. It’s also sensible to test a small batch first, particularly if your store has many products.
Product images may need extra attention. Depending on how the CSV references them, you may need to upload the images separately or make sure they are accessible to the importer.
After importing, check product names, descriptions, prices, stock quantities, categories, and variations. Test the shopping cart and checkout process before directing customers to the new store. Larger stores may benefit from a specialized migration service.
7) Rebuild Your Menu and Set Up Redirects
Recreate your navigation using Appearance, Menus in classic themes, or the Site Editor in block themes.
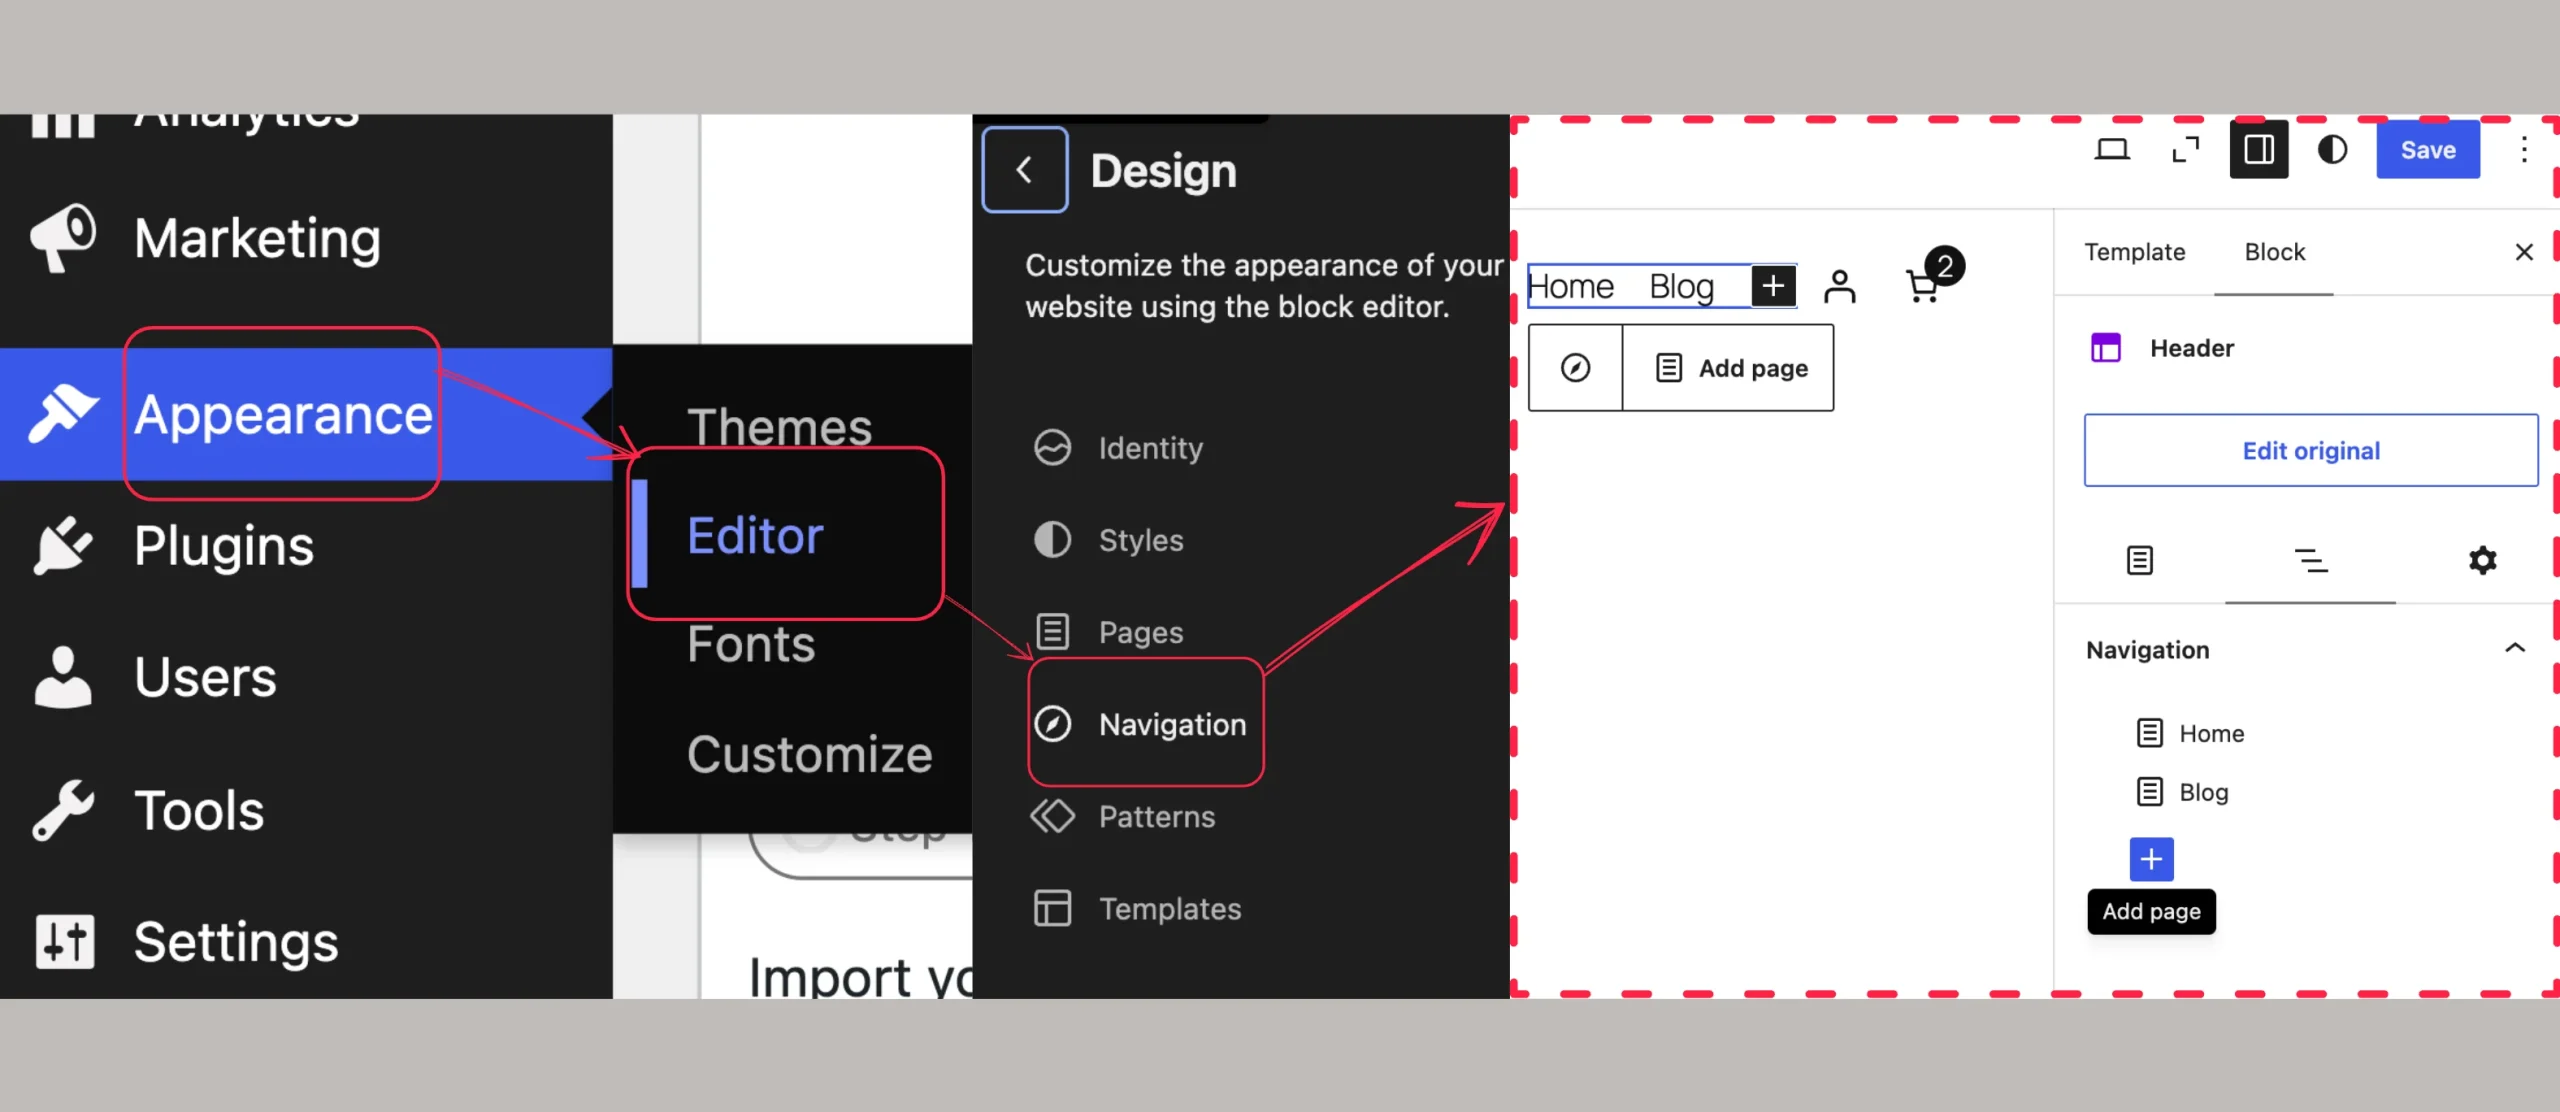
Add your main pages, arrange them in the right order, and check that dropdown menus work as expected.
Next, plan how visitors will reach your new pages from old links.
Your Wix website may already have links indexed by Google, shared on social media, or saved by customers. If those addresses change, visitors could encounter missing-page errors unless you provide a working redirect or another suitable route to the new content.
To manage the change:
- Make a list of your old Wix page and blog URLs.
- Match each old address to the corresponding WordPress URL.
- Configure redirects using a suitable method supported by your setup.
- Test the old addresses to confirm they reach the correct destinations.
Redirects can be more complicated when leaving Wix because support depends on how the old site and domain are configured. Don’t assume a redirect will work simply because you’ve added it to WordPress; test it from a browser.
Some temporary changes in search visibility can occur during a migration.
Keeping URL changes to a minimum, redirecting important pages where possible, and updating your sitemap can help search engines process the new site.
8) Move Your Domain and Preserve Your Email
Wait until your WordPress website has been built and tested before making the domain switch. The process depends on if Wix or another company currently registers your domain.
If your domain is registered with Wix:
- Open the Domains section in your Wix account.
- Find your domain, open its actions menu, and choose Transfer away from Wix.
- Follow the transfer instructions and obtain the authorisation code, also known as the EPP code.
- Submit the code to your new registrar and complete the transfer requirements.
Your domain must be eligible for transfer and unlocked where required. Wix advises that a transfer can take up to seven days, although the actual time may vary.
Disabling Private Registration beforehand, where applicable, can also help you receive the necessary transfer communications.
Be aware of ICANN’s 60-day transfer restrictions. These can apply after a new registration, certain changes to registrant details, or a previous transfer. If your domain is still within a restricted period, you may need to keep it registered with Wix and point it to your new hosting account instead.
If your domain is registered elsewhere, you don’t need to transfer it to another registrar. Instead, update its DNS settings so that it points to your new WordPress hosting.
Follow the DNS instructions provided by your hosting company, and check the settings before making changes.
The correct records depend on your hosting setup.
Keep your email working:
Your website host, domain registrar, and email provider are separate services, even if you purchased them through the same company. Moving your website does not automatically transfer your email messages or mailbox.
Reconfigure your MX records at the appropriate DNS provider to keep business email working.
If you purchased Google Workspace through Wix, check your subscription and billing arrangements before making changes.
If you’re changing email providers as well, plan a separate mailbox migration to transfer your existing messages, contacts, and other data. Test both incoming and outgoing email after the domain changes have taken effect.
9) Test the New Website Before Cancelling Wix
Before cancelling your Wix plan, take a final pass through the new website.
Check the following:
- All pages load correctly, and the navigation menu links lead to the right places.
- Images display properly and are stored on WordPress rather than relying on Wix-hosted files.
- Contact forms deliver messages to the correct email address.
- Old URLs redirect to the appropriate WordPress pages where redirects are supported.
- Your domain displays the new WordPress website.
- You can send and receive email using your domain.
If you run an online store, test the shopping cart, checkout, payment processing, and order notifications too.
Only cancel Wix after you’re satisfied that your new website, domain, and email are working as expected.
There’s one more change to prepare for. With self-hosted WordPress, you’re responsible for routine maintenance that Wix manages as part of its hosted service.
Set up regular backups, keep WordPress and its themes and plugins updated, and take reasonable steps to secure your website.
How to Move from Wix to WordPress FAQs
1) Which one is better, WordPress or Wix?
WordPress gives you more control over your hosting, plugins, and how the site is managed. Wix is simpler to start with but limits what you can do as the site grows. The right choice depends on how much flexibility you need.
2) What is a disadvantage of using Wix?
The main one is that Wix locks your site to its own servers. You cannot export the whole site and move it to another host, which is exactly why moving to WordPress involves a rebuild rather than a simple transfer.
3) What is cheaper, WordPress or Wix?
WordPress itself is free. You pay for hosting separately, which gives you more options on cost. Wix includes hosting in its subscription, but the pricing is fixed. Compare what each plan covers before deciding.
4) What happens to my domain name if I cancel Wix?
If Wix is your registrar, the domain stays in your account and you can transfer it or point it elsewhere. If another registrar holds it, cancelling Wix does not affect the domain at all. Transfer or redirect the domain before cancelling so your site does not go dark.
5) How to migrate a website without losing SEO?
Start by keeping your URL structure as close to the original as practical. Create a list of your old URLs, map them to their new destinations, and configure and test redirects wherever possible.
Also, transfer your important content, preserve relevant page titles and metadata, update internal links, and submit your new sitemap to Google Search Console. Monitor indexing and search performance after the migration.
You can’t guarantee that rankings will remain unchanged, but careful planning can reduce avoidable problems.
Build Your WordPress Website with Truehost?
There is no export button, so the move comes down to a rebuild: set up hosting, bring over your posts and pages, then switch your domain and email last.
Remember to keep Wix running until the new site passes your checks, and you won’t lose a day of traffic.
Moving from Wix gives you the opportunity to rebuild your website on WordPress, with more control over your hosting environment, plugins, and site management.
So, when you’re ready for the hosting part, you can see our WordPress hosting plans and pick one that fits your site.
Once your hosting is active, install WordPress, rebuild your pages, migrate your content, and switch your domain only after everything has been tested.
