To start a blog in Uganda, you need a subject worth covering, a website address, a place to host the site, and your first useful article. For a blog you want to own and grow, we recommend registering your own domain and installing WordPress on a hosting account you control.
This guide takes you from choosing a topic to publishing and checking your first post. We’ll use a hypothetical Kampala food blog to show what each decision looks like in practice. You can apply the same process to education, farming, travel, technology or another subject you know well.
You do not need to buy a premium theme or learn to code before starting. You do need to make a few decisions in the right order: choose the publication, buy the right services, configure the site, then invite readers.
Follow the guide in stages:
Before you start
Prepare these before opening checkout:
An email account you already use. Use it for your domain, hosting and WordPress recovery. You must be able to access it if your blog stops working.
A laptop or desktop for setup. You can check the finished site on your phone; the larger screen makes account setup and editing easier.
Two or three possible blog names. Your first choice may already be registered.
Money for the selected billing term. Budget for the whole annual invoice if you choose annual hosting.
One article idea and any original photos or notes it needs. You will use these to test the site with real content.
A domain is the address people type. Hosting stores the website’s files and database. WordPress is the software you use to create pages and posts. Buying the address alone does not create the blog.
Plan your blog
1) Choose a reader and a problem you can keep covering
Start by finishing this sentence:
My blog helps [a specific reader] make [a specific decision] using [information I can collect].
For our example: “My blog helps Kampala office workers choose lunch using meal details, waiting times and the cost of getting there.” That is a stronger starting point than “I will blog about food.” It tells you what to investigate and what a reader should gain.
Write down three questions that audience asks. Then turn each into a possible article:
Reader question | What to investigate | Article idea |
|---|---|---|
Will I get back within my lunch break? | Ordering time, preparation time and travel route | How to compare a lunch spot before you spend |
What does the advertised meal price include? | Portions, sides, drinks and extra charges | Questions to ask before ordering a lunch special |
Can I plan meals around my work week? | Nearby options, opening hours and takeaway availability | A five-day lunch-planning checklist |
The test is whether you can gather useful information repeatedly. If every post requires an expensive trip you cannot sustain, narrow the coverage area or choose a subject you can research closer to home.
Before paying for the website, outline your first three articles. Each should answer a different question. This gives the blog a direction and avoids launching a site whose only content is an introduction to itself.
2) Decide between a hosted service and your own WordPress site
You can start in either of two ways. A hosted service manages the website platform for you. With self-hosted WordPress, you choose the hosting account, own the domain separately and manage the installation.
If you need… | A practical starting route |
|---|---|
A free place to practise writing before committing to a website budget | A hosted blog on a service address |
Your own address and control over the installation, themes and plugins | Self-hosted WordPress with a registered domain |
Someone else to handle technical maintenance | A hosted service, or a clearly agreed maintenance arrangement for WordPress |
WordPress.com’s free plan is one hosted option. A custom domain is a separate paid decision there. WordPress.org supplies the software for the self-hosted route; you pay for the services around it.
If you begin on a hosted platform, check how you will move your work later. A content export can include posts, pages and comments without carrying over the complete design or plugins. Registering your own domain also means you can keep the address when you change the service behind it.
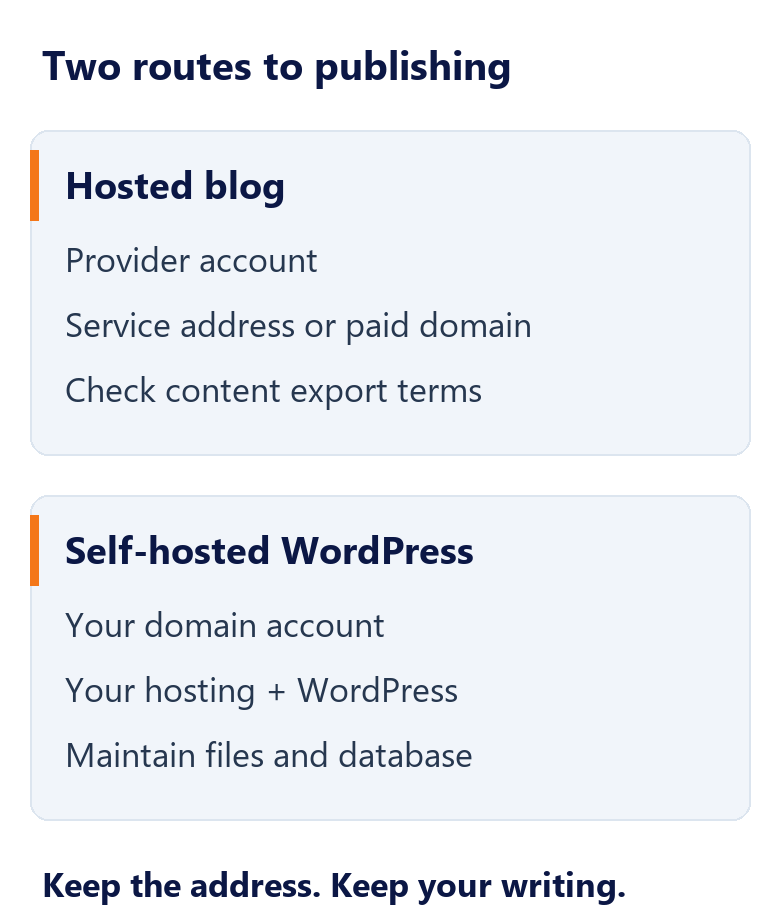
The hosted route simplifies platform management. The self-hosted route gives you separate control over the address and installation.
The remaining steps follow the self-hosted WordPress route. If you choose a hosted service, use its own setup process, then return to the content and launch stages below.
3) Choose a blog name that leaves room to grow
Your name should be easy to say, spell and recognise. Say it aloud to someone and ask them to write it down. If you have to explain several hyphens, unusual spellings or numbers, try another name.
For the food example, “Kampala Lunch Notes” gives a clear local focus. A broader name would leave room to cover other towns later. Both can work; the choice depends on the publication you intend to build.
Check three things before settling on a name:
Search the web for an existing publication or business using it.
Check the domain you want, including its extension.
Check whether a usable social profile name is available on your intended distribution channel.
A .com suits a publication whose coverage may expand. A .ug can identify a Uganda focus. Our Uganda extensions guide explains the local choices. Choose the extension for the publication and budget; do not expect the ending alone to attract search traffic.
Buy the essentials
4) Set a budget, then register the domain
The two core purchases are your domain and hosting. Start with those; a paid theme, logo service and premium plugins can wait until the blog needs them.
For a .com with annual Starter hosting, use this starting worksheet:
Item | Cost to budget |
|---|---|
.com registration | 8.24 USD for the first year |
.com renewal | USh 45,144.00 per year |
Starter hosting | USh 106,860.00 for an annual term |
Theme and initial plugins | Begin with suitable free options; add paid tools only when you need their features |
Your first-year budget is the domain registration plus the selected hosting term, any taxes and the extras you deliberately choose. The next-year budget uses the domain renewal and the hosting renewal quoted for your account. Keep both figures in your notes before buying.
Now open our domain search and check your preferred name. Enter the full address carefully. If it is unavailable, try your second name or another suitable extension; avoid turning a simple name into a confusing string of hyphens just to keep it.
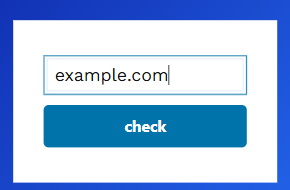
Enter the complete domain name in our search field.
If the checker returns an error instead of an availability result, ask us to check the name before paying. An error is not a confirmed available or unavailable domain.
Before completing registration, check the spelling, extension, number of years and registrant details on the order. Use your own contact information and accessible email address. If someone helps you buy it, make sure the domain remains in an account you control.
The checkout total is what you must pay. Verify the currency, tax and payment method there. Ask us to confirm any payment option you need that does not appear. Do not budget for a free .ug unless your selected offer explicitly includes that extension and term.
After registration, keep the confirmation, renewal date and account login together in a secure place. You will need the domain account when connecting the address to hosting.
5) Choose hosting for one WordPress blog
Open our hosting plans and compare them against the site you are actually launching. A single text-and-photo blog does not need the same arrangement as a large store or several websites.
Starter is a starting option to assess, with an annual term of USh 106,860.00. Before selecting it, confirm that its current storage, WordPress installation tools, certificate provision and backup arrangements fit your blog. In particular, ask how to restore a backup and whether that service costs extra.
To configure the order:
Choose Select under Starter on the hosting page.
Choose the appropriate domain route: register a new address if you have not bought one, or use your existing domain if you have. Enter an existing address without
https://or a page path.On the product configuration, select Annually if you want the annual term used in the budget above. Use the currency menu to select UGX, then recheck the selected term and total.
Continue to checkout and review the amount due today, recurring term and any additions before paying.
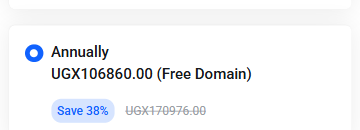
Select the annual term, then check the currency and amount.
An annual total is a payment for the year, even when a marketing page also shows an equivalent monthly amount. Remove optional additions you do not need. Confirm that the payment method you intend to use is available on the order.
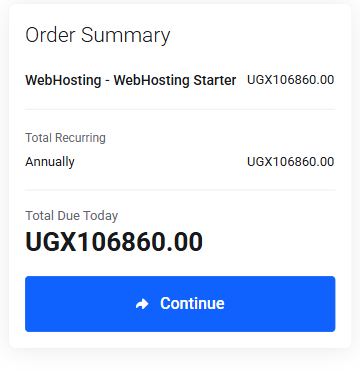
Check the billing term and amount due today before continuing. Prices shown were captured on 8 October 2026.
Use your own email for the hosting account. After activation, find the welcome message containing the control-panel access and server details. Save it securely. Your billing account and WordPress administrator account serve different purposes; keep access to both.
If the hosting service has not activated, resolve that with us before trying to install WordPress. A paid invoice and a working hosting account are separate checkpoints.
Set up WordPress
6) Connect the domain and check HTTPS
The domain must point to the hosting service before readers can reach your blog. If you bought both together, check whether the connection is already configured. If the address was registered elsewhere, you will make the change in that domain account.
Use the nameservers supplied for your hosting account in our welcome message. Our nameserver guidance explains where those values come from. Do not copy another customer’s server names or an old screenshot.
For a new, unused domain, the connection process is:
Open the domain’s nameserver settings in the account where it is registered.
Replace the current values with the complete set supplied for your hosting service.
Save the change and keep a record of what you entered.
Allow DNS caches to update, then check the domain again.
If the domain already handles email or another website, ask us to plan the change first. Moving nameservers can affect those services too; existing mail records need to remain in the active DNS zone.
Next, check that your hosting service has issued a valid certificate for the address. In cPanel, when the feature is available, SSL/TLS Status shows the domain’s certificate status. The certificate controls also support an AutoSSL run where enabled.
Open the domain using https://. If the browser reports a certificate problem, stop and resolve the domain or certificate configuration with us. Do not use an insecure address as the permanent WordPress URL just to move past the warning.
You are ready for installation when the domain is assigned to the hosting account and HTTPS works for the intended address.
7) Install WordPress at the correct address
Open the hosting control panel using the access details supplied for your account. If your account provides cPanel and Softaculous, use the following installer route. For a different panel, ask us for that account’s WordPress installation path instead of looking for controls it does not have.
In cPanel, open Softaculous Apps Installer, choose WordPress, then open Install. Our cPanel walkthrough documents that route. You do not need to upload WordPress files manually for this method.
Fill the installation form carefully:
Setting | What to enter |
|---|---|
Protocol |
|
Domain | The registered address you connected in step 6 |
In Directory | Leave blank for a blog at the main address |
Site Name | Your chosen blog name |
Site Description | A short description of the publication |
Admin Username | A username you choose for managing the site |
Admin Password | A unique password stored securely |
Admin Email | An inbox you can access independently of the new blog |
The directory field decides where WordPress lives. Leaving it blank installs at the domain root; entering wp puts the site under /wp/. The Softaculous instructions confirm this distinction. For a new standalone blog, use the root unless you intentionally want a subfolder.
Review the full installation address, then start the installation. When it finishes, open both the site link and the administrator link provided by the installer. Save the administrator address along with your login.
Do not install over an existing website. If the installer reports existing files or another installation, check the selected domain and directory before proceeding. For a fresh blog, those warnings deserve investigation rather than an overwrite.
The result should be a working WordPress site and an administrator dashboard you can enter. This is the point where hosting setup becomes a publishing workspace.
8) Set the blog’s basic options before publishing
Open your WordPress administrator address, usually your domain followed by /wp-admin/. Sign in using the WordPress credentials you created in the installer.
The WordPress screenshots below demonstrate the controls in WordPress Playground. Follow these steps in your own hosting account to launch the live blog.
Start under Settings → General. Enter the blog’s site title and tagline, check the administration email, and choose Kampala as the timezone where offered. This keeps scheduled publishing aligned with Uganda time. Save the changes. WordPress’s general settings control these values.
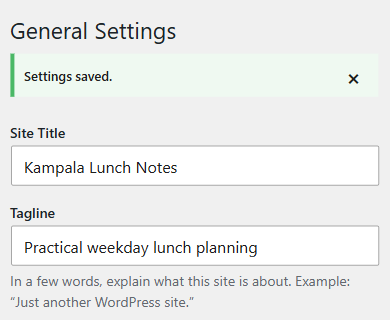
Save the site title and a short tagline under General settings.
Leave the WordPress Address and Site Address alone unless you are deliberately correcting the site’s URL with a clear plan. Changing the wrong address can make access difficult.
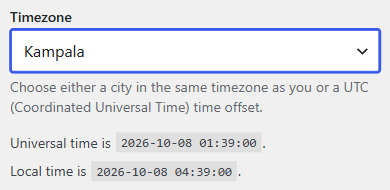
Choose Kampala so scheduled posts follow Uganda time.
Next, open Settings → Permalinks, choose Post name, and save. A title such as “How to compare a Kampala lunch spot” can then have a readable address ending in /compare-kampala-lunch-spot/. Set the permalink structure before sharing your articles so you do not have to change established links later.
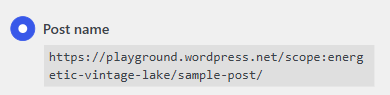
Select Post name for readable article addresses, then save.
Under Settings → Reading, choose Your latest posts for a straightforward blog homepage. If you later want a separate landing page, create a Home page and a Blog page, then assign them as the static homepage and posts page. They must be different pages. The reading settings determine this arrangement.
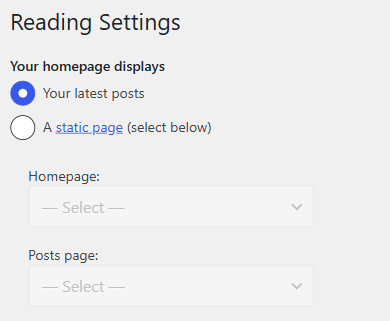
Use Your latest posts for a simple blog homepage.
Finally, decide whether to allow comments. If you enable them, use Settings → Discussion to require manual approval before a comment appears, then save. This gives you a manageable moderation queue while the blog is new. A contact route can serve readers if you prefer to keep comments closed.
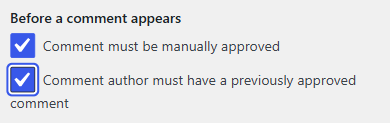
Require manual approval before comments appear.
9) Choose a readable theme and keep the design simple
The theme controls how the blog looks. Begin with the theme already installed if it presents your posts clearly. Changing themes is useful when it solves a layout problem; it is not a prerequisite for writing.
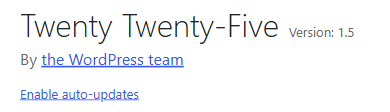
Check the installed theme’s name before changing the design.
To try another free option, go to Appearance → Themes → Add Theme, find a suitable theme, preview it, then install and activate it. The theme controls let you change the active design.
Judge the theme with an article, not just its demo homepage. Check whether the title, paragraphs, images and navigation work on a phone. For the food blog, clear meal photos and readable reporting matter more than animation or a large slider.
With a block theme, Appearance → Editor provides the site’s templates, styles and navigation. Classic themes commonly use Appearance → Customize and their own menu controls. Use the editor your active theme provides; the Site Editor applies to block themes.
For the first version, set the title or logo, choose a simple colour scheme and keep the menu short. You will add the useful pages next. Skip extra sidebars, pop-ups and social buttons until you have a reason to use them.
Add plugins only for functions the site still needs. Check whether the host already provides caching and backups before installing duplicates. A form plugin is useful if you want messages through the site; an SEO plugin can help manage search titles and a sitemap.
To add one, open Plugins → Add Plugin, search for it, read its details and compatibility information, then choose Install Now and Activate. Open its settings and configure the function you installed it for. The plugin workflow separates installation from activation; an activated form plugin still needs a recipient and delivery test.
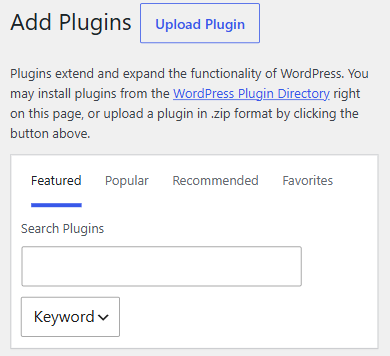
Find plugins through the directory search and review their details before installing.
Publish and launch
10) Create About and Contact pages
Posts are your recurring articles. Pages hold information readers need to find regardless of the publication date, such as who writes the blog and how to contact you.
Open Pages → Add Page, enter About as the title and explain who the publication serves, who writes it and how you collect information. Use specific wording. For our hypothetical example:
Kampala Lunch Notes helps office workers plan weekday lunches. We compare meal details, waiting times and travel practicalities. Each report states when the information was checked; readers can contact us with corrections.
Replace that sample with information you can actually support. Do not describe visits, testing or expertise you have not done.
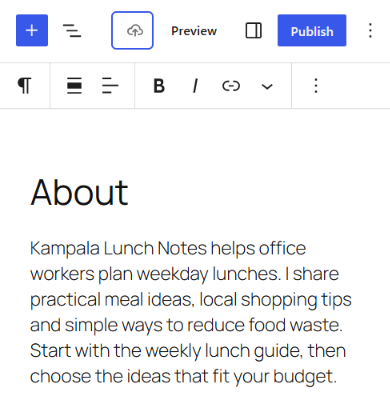
Give the About page a title and an introduction that explains who the blog serves.
Publish the page, then create Contact through the same page workflow. Add a working email address or a contact form you can test. A form needs its own setup; publishing a page named Contact does not configure message delivery.
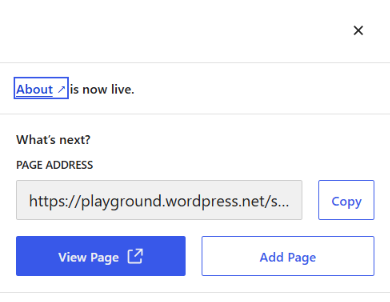
After publication, use View Page to check the page at its own address.
Add links to About and Contact in your theme’s navigation, alongside the blog or homepage. Open each link on the site to check it goes to the published page. WordPress’s page workflow supports this separate page content.
If you add analytics, a mailing list or other tools that collect reader information, prepare privacy information that describes your actual setup. Avoid pasting a policy that names services you do not use.
11) Write, format and publish your first article
Choose one of the questions from step 1. Gather the information before opening the editor: notes, original images, the dates checked and any sources the reader needs.
For the food blog, the first article is “How to compare a Kampala lunch spot before you spend.” A useful outline would cover the total meal cost, waiting time, route from work and a short checklist. It would not need an invented list of the city’s “best” restaurants.
Begin by answering the title’s question. Then explain how the reader can act on the answer. This sample opening gives the article a clear direction:
Before you choose a lunch spot, compare the full meal cost, the time you have and the route from work. A menu price alone does not tell you whether lunch fits your break.
Now create the post:
Open Posts → Add Post and enter the title.
Add the opening and body as separate Paragraph blocks.
Use Heading blocks when the subject changes, with H2 for the article’s main sections.
Add your images where they explain the subject; include descriptive alt text.
Save a draft, then preview the article before publishing.
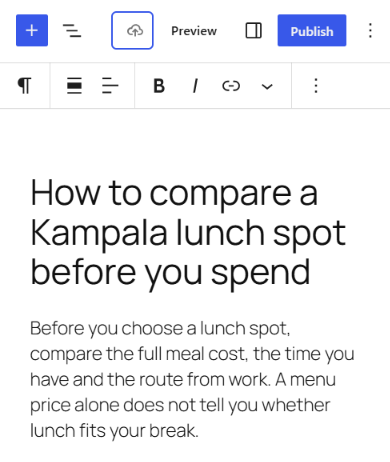
Write a clear title and opening, then save the article as a draft.
The block editor lets you work with paragraphs, headings, images and lists separately. Use a list for a checklist and connected paragraphs for an explanation; do not turn every sentence into a bullet.
In the post settings, check its category, URL slug, author and featured image. A category such as “Lunch planning” gives future related posts a home. Use a short slug such as compare-kampala-lunch-spot instead of keeping unnecessary words from a long title. The post settings control these publication details.
Read the preview on a phone. Look for an opening that answers the question, headings you can scan, complete images and links that work. Correct the draft, then select Publish and confirm its visibility and timing.
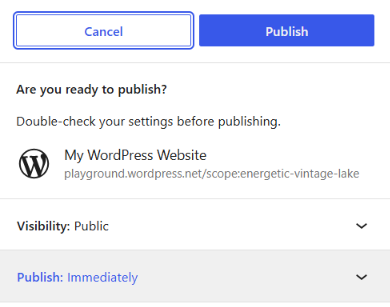
Check visibility and publication timing before confirming Publish.
In a WordPress Playground test, I published the lunch-planning example, changed its title and reopened the post. The new heading appeared at the original address. You can practise in WordPress Playground before using your hosting account; the sandbox does not publish your live blog.
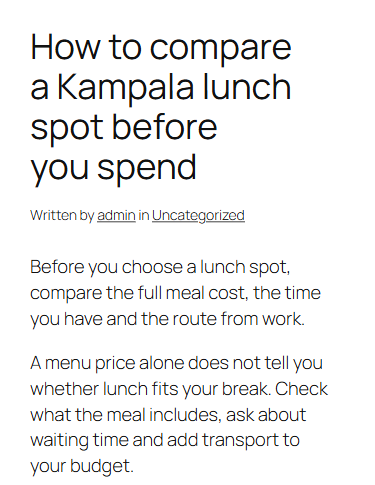
The sandbox example shows a focused title and opening. Its edited heading persisted when the post was reopened.
Once published, reopen the article from its site address. If you spot an error, return to Posts, edit that article, save the change and check the public page again. Avoid changing the URL after sharing it unless you also arrange a redirect.
12) Check the live blog before announcing it
Open a private browser window where you are not signed in. Visit the homepage, first article, About page and Contact page. This catches problems that an administrator’s view can hide.
Work through these checks:
Public access: the pages open without a login request or maintenance screen.
HTTPS: the address uses
https://and the browser shows no certificate warning.Phone layout: headings fit, text is readable, images are complete and the menu opens correctly.
Article links: each link goes to the intended destination.
Contact delivery: send a test message through your chosen contact route and confirm you receive it.
Editing: make a small correction, save it and verify the updated public page.
Recovery access: confirm you can reach the email used for WordPress, hosting and the domain.
Backup: confirm what gets saved, how often it runs and how you would restore the site.
For a complete WordPress backup, you need the files and database. A content export alone is not a full site recovery plan. Ask us to confirm the available backup and restore arrangement for your account, and keep an appropriate copy outside the live site.
When the site is ready to be found, check Settings → Reading and clear Discourage search engines from indexing this site if you previously enabled it. Save, and remove any separate coming-soon restriction. Leaving the setting enabled can work against the launch.
You can then verify the website in Google Search Console. Google’s discovery guidance explains how to make a site discoverable.
Once the property is verified, paste the complete first-article address into URL Inspection. Review its indexing status. If it is not indexed, use Test live URL to check the current page, resolve any reported access problem, then use Request indexing where offered. The inspection tool checks a specific page; submitting a request does not guarantee indexing or a ranking. Keep publishing while you monitor the result.
Build your routine
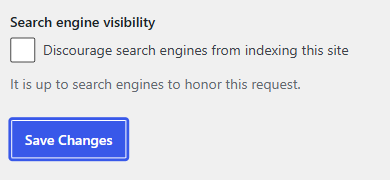
Leave the search-engine discouragement box clear when the blog is ready for readers.
13) Share the first article where its readers already gather
Start with one relevant channel. For the lunch example, that could be a workplace community, a local Facebook group that allows useful links, or people who asked the question you answered.
Explain the article’s value when sharing it. A useful sample message is:
Choosing somewhere to eat during a short lunch break? I put together a checklist for comparing meal cost, waiting time and the trip from work. What do you check before trying a new spot?
Add the article link and invite a specific response. Read the group’s rules before posting, and do not send the same promotional message to unrelated groups.
Use the replies to identify the next article. If readers ask about takeaway collection, investigate that question. If they point out a missing charge or changed opening time, verify it and update the original post.
Give readers one clear way to return: a social account you maintain or a mailing list they can choose to join. If you offer email updates, complete the signup and confirmation yourself before advertising the form. A submitted email address is only the start of that journey.
14) Keep a publishing and maintenance schedule you can sustain
Choose a rhythm that leaves time for research, writing and corrections. One well-researched article a week is a sensible initial target if it fits your workload; reduce the pace if you cannot gather the evidence that often.
For the food example, the first month could look like this:
Week | Publishing task | Maintenance task |
|---|---|---|
1 | Publish the lunch-comparison checklist | Complete the launch checks |
2 | Explain what to ask about a lunch special | Check contact delivery and reader replies |
3 | Publish the five-day planning article | Review backups and pending updates |
4 | Answer the most useful reader follow-up | Recheck earlier information and renewal dates |
Keep a simple record of each idea, the reporting still needed, its draft status and its publication date. Record corrections in the same place so they do not depend on memory.
Before applying major site updates, make sure you have a current backup. Afterwards, reopen the homepage, an article and the contact route. Also keep reminders for the domain and hosting renewals; a blog depends on both remaining active.
Measure progress through the work and the response: articles completed, questions answered, corrections received, returning readers and useful enquiries. Advertising, affiliate links, sponsored coverage or your own products can come later, once you know who reads the blog and what they need. Keep any paid relationships clear to readers.
If something goes wrong
Use the symptom to choose the next check rather than reinstalling the website immediately.
Problem | Check first | What to do next |
|---|---|---|
The domain does not open the blog | Registration status, nameservers and hosting activation | Compare the values with your welcome message; ask us to check the connection |
The browser shows a certificate warning | The exact domain and certificate status | Resolve DNS or certificate provisioning before forcing HTTPS |
WordPress appears under | The installation directory | If the site is already populated, ask for a move to the root; do not overwrite it |
Homepage works but an article returns 404 | The article’s published status and permalink settings | Reopen Settings → Permalinks and save; if it persists, ask us to check server rewrite rules |
You cannot sign in | The WordPress login address and recovery inbox | Use the password recovery route; contact us if the reset message does not arrive |
A contact form says sent, but no message arrives | Form recipient, spam folder and mail setup | Test delivery and resolve it before inviting enquiries |
The blog is public but missing from search | Reading settings, coming-soon restrictions and Search Console | Remove unintended indexing blocks and inspect the article URL |
When asking for help, send us the affected URL, what you expected, what happened and the exact error text. That gives us a clearer starting point than “my blog is not working.”
You can begin with our hosting plans once you have chosen your topic and name. If you need help matching the domain, billing term or installation route, contact us with those details. Your launch target is a useful first article on a working site, followed by a routine you can keep.
