A WordPress site can break after a plugin update, a failed migration, a hacked login, or a simple mistake in the dashboard. A recent backup turns that moment from a disaster into an inconvenience, because you can put the site back the way it was.
So, a WordPress website backup decides if a bad plugin update costs you five minutes or the whole site.
That said, it’s important you understand how to create a backup for your WordPress website and how to restore it when needed.
We also cover the habits that keep your backups reliable, so the file you saved last month still works when you need it.
Let’s look at the different ways to back up and restore a WordPress website effectively.
What a Complete WordPress Backup Contains
A complete WordPress backup has two essential parts: your website files and your database. You need both to restore a typical WordPress website to its previous state.
- Website files: These include WordPress core files, plugins, themes, images, other media uploads,
wp-config.php, and.htaccess. - Database: This stores your posts, pages, comments, links, and website settings.
Your website files and database work together.
For example, restoring your files without the database might bring back your theme and plugins, but your posts and pages may be missing. Restoring the database alone may recover your content without the images or theme files needed to display it properly.
Keep the two parts together and label them with the same backup date. That way, you can match the database to the correct set of files when restoring your website.
Ways to Back Up and Restore a WordPress Website
There are several ways to back up your WordPress website. Your hosting provider may already keep copies of your site, a plugin can automate the process, or you can download the files and database yourself.
Choose the method that suits your website and how much control you want over the process.
Before restoring any backup, remember that it can replace your current website files or database. Save a fresh copy of your current site first, especially if you have received new orders, published posts, or made other changes since the backup was created.
1) Back Up and Restore with cPanel Backup Wizard
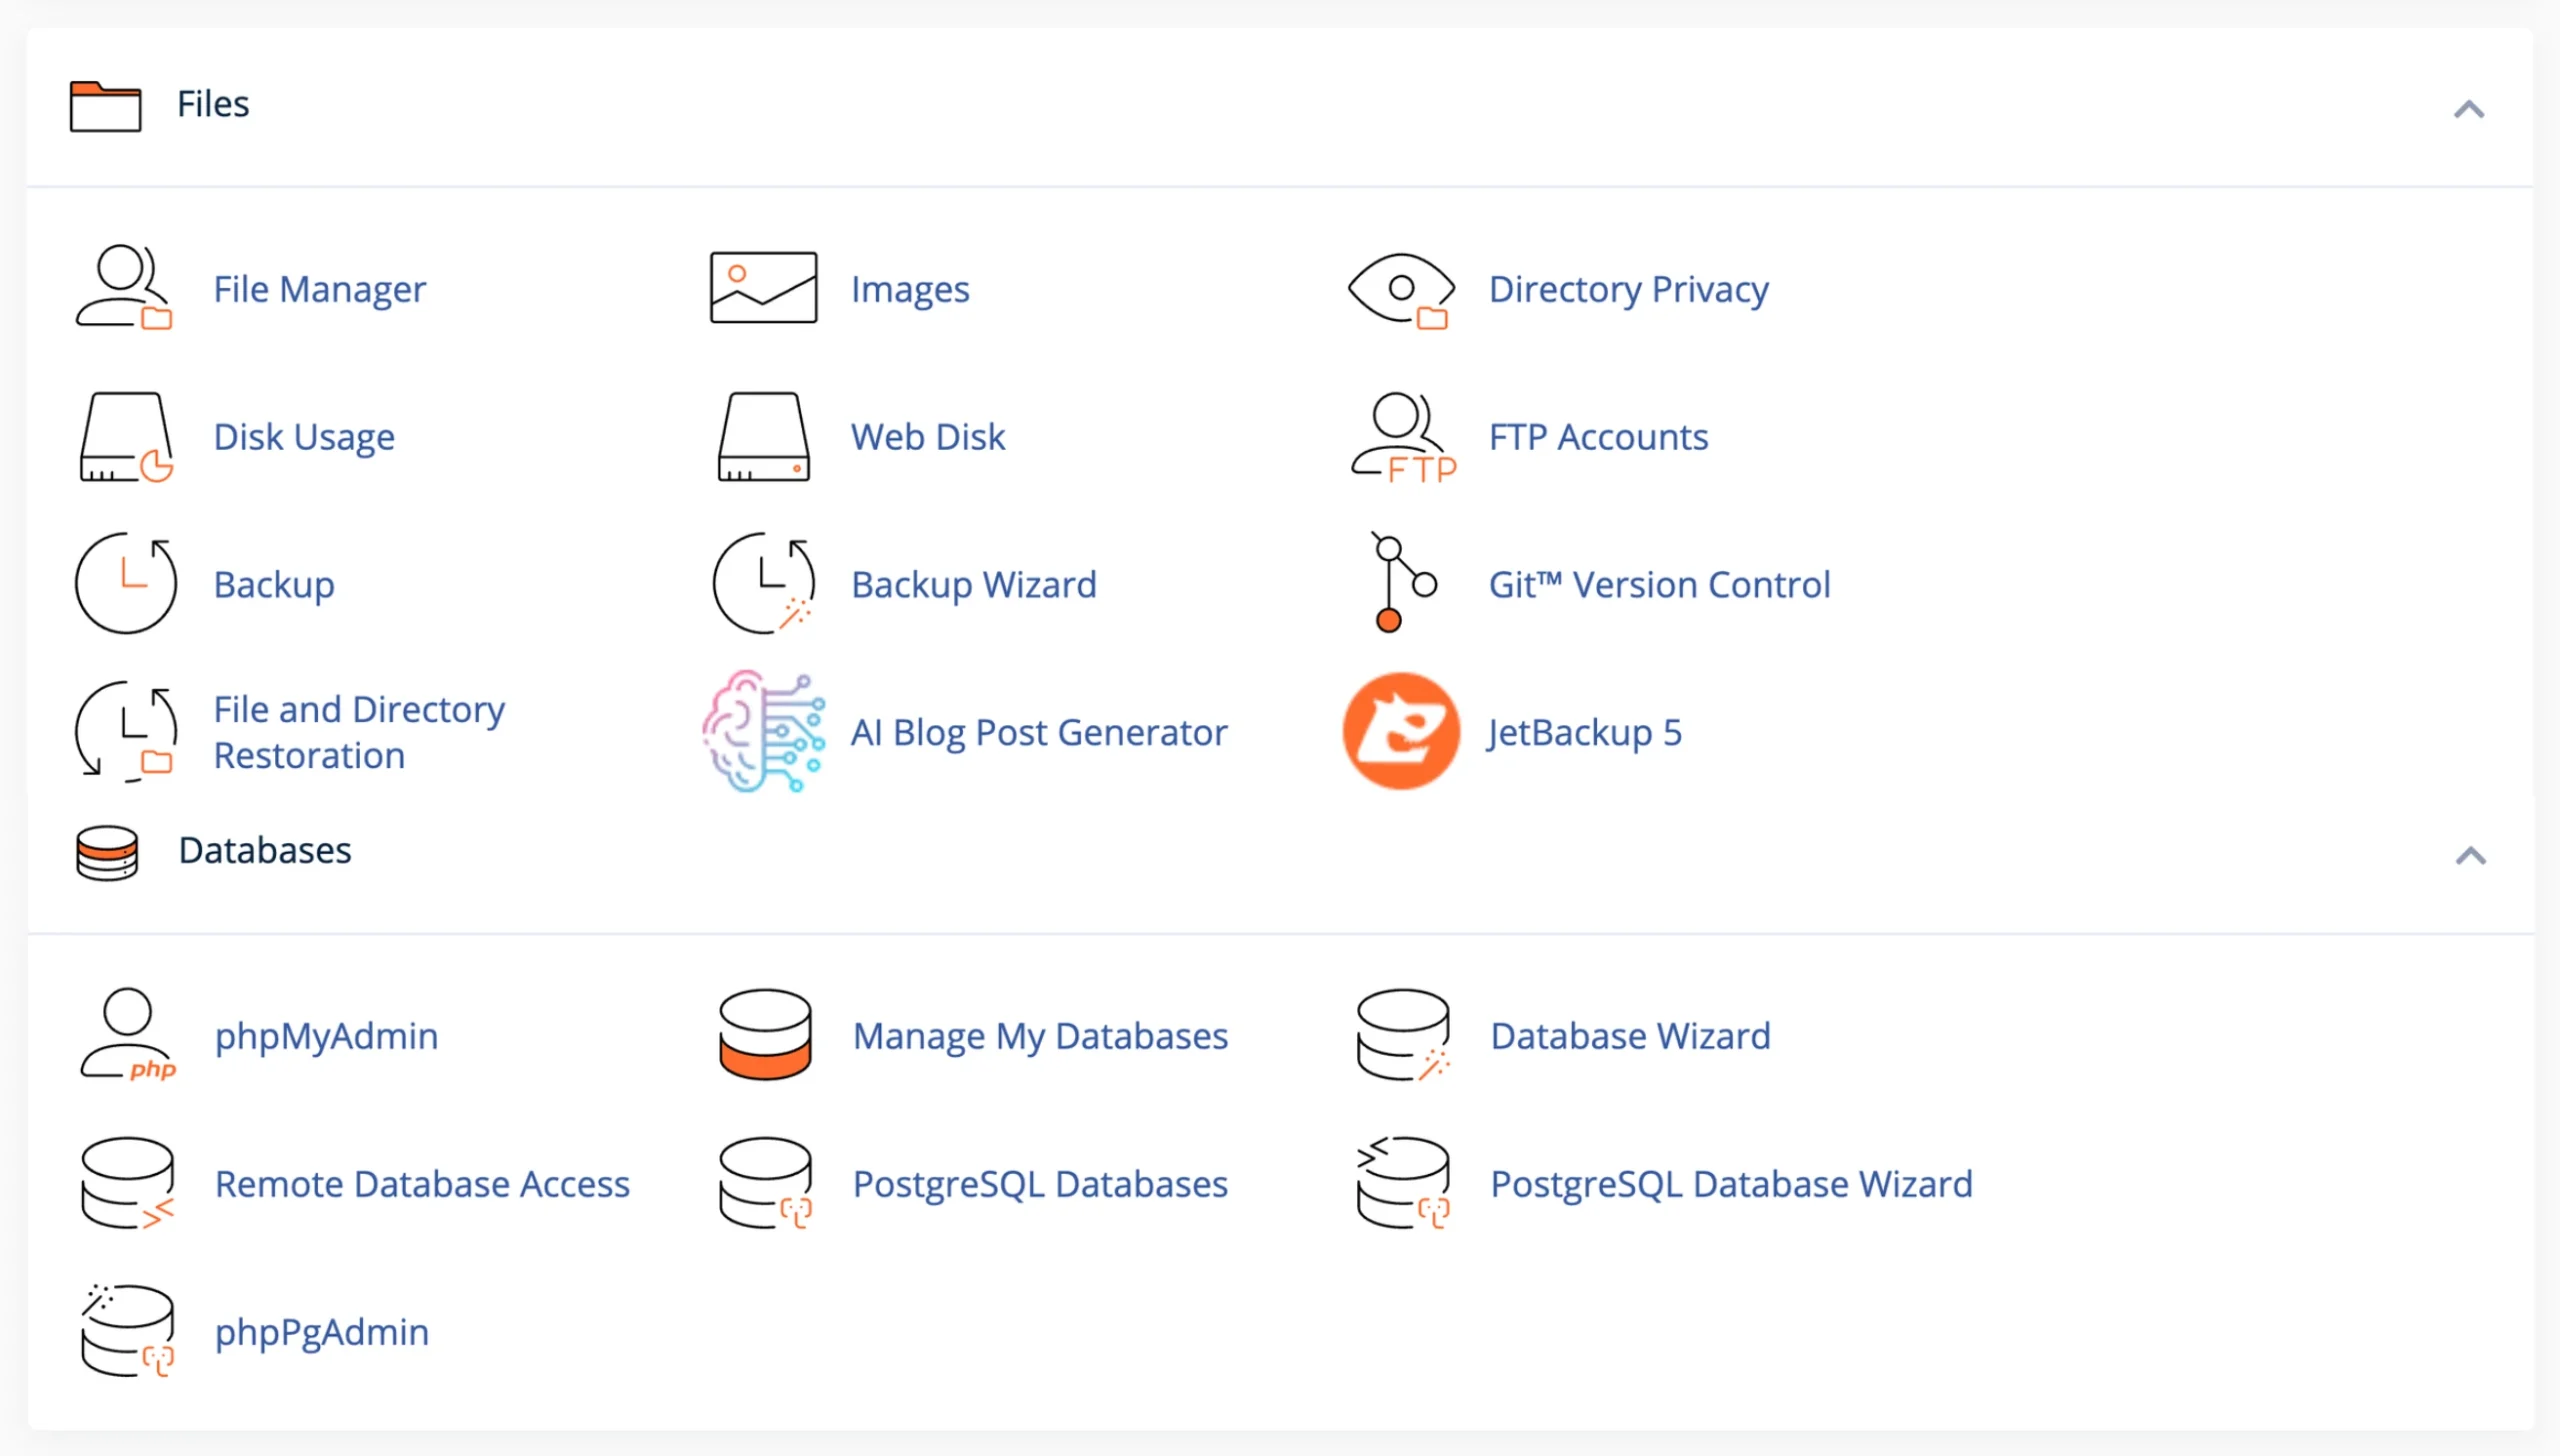
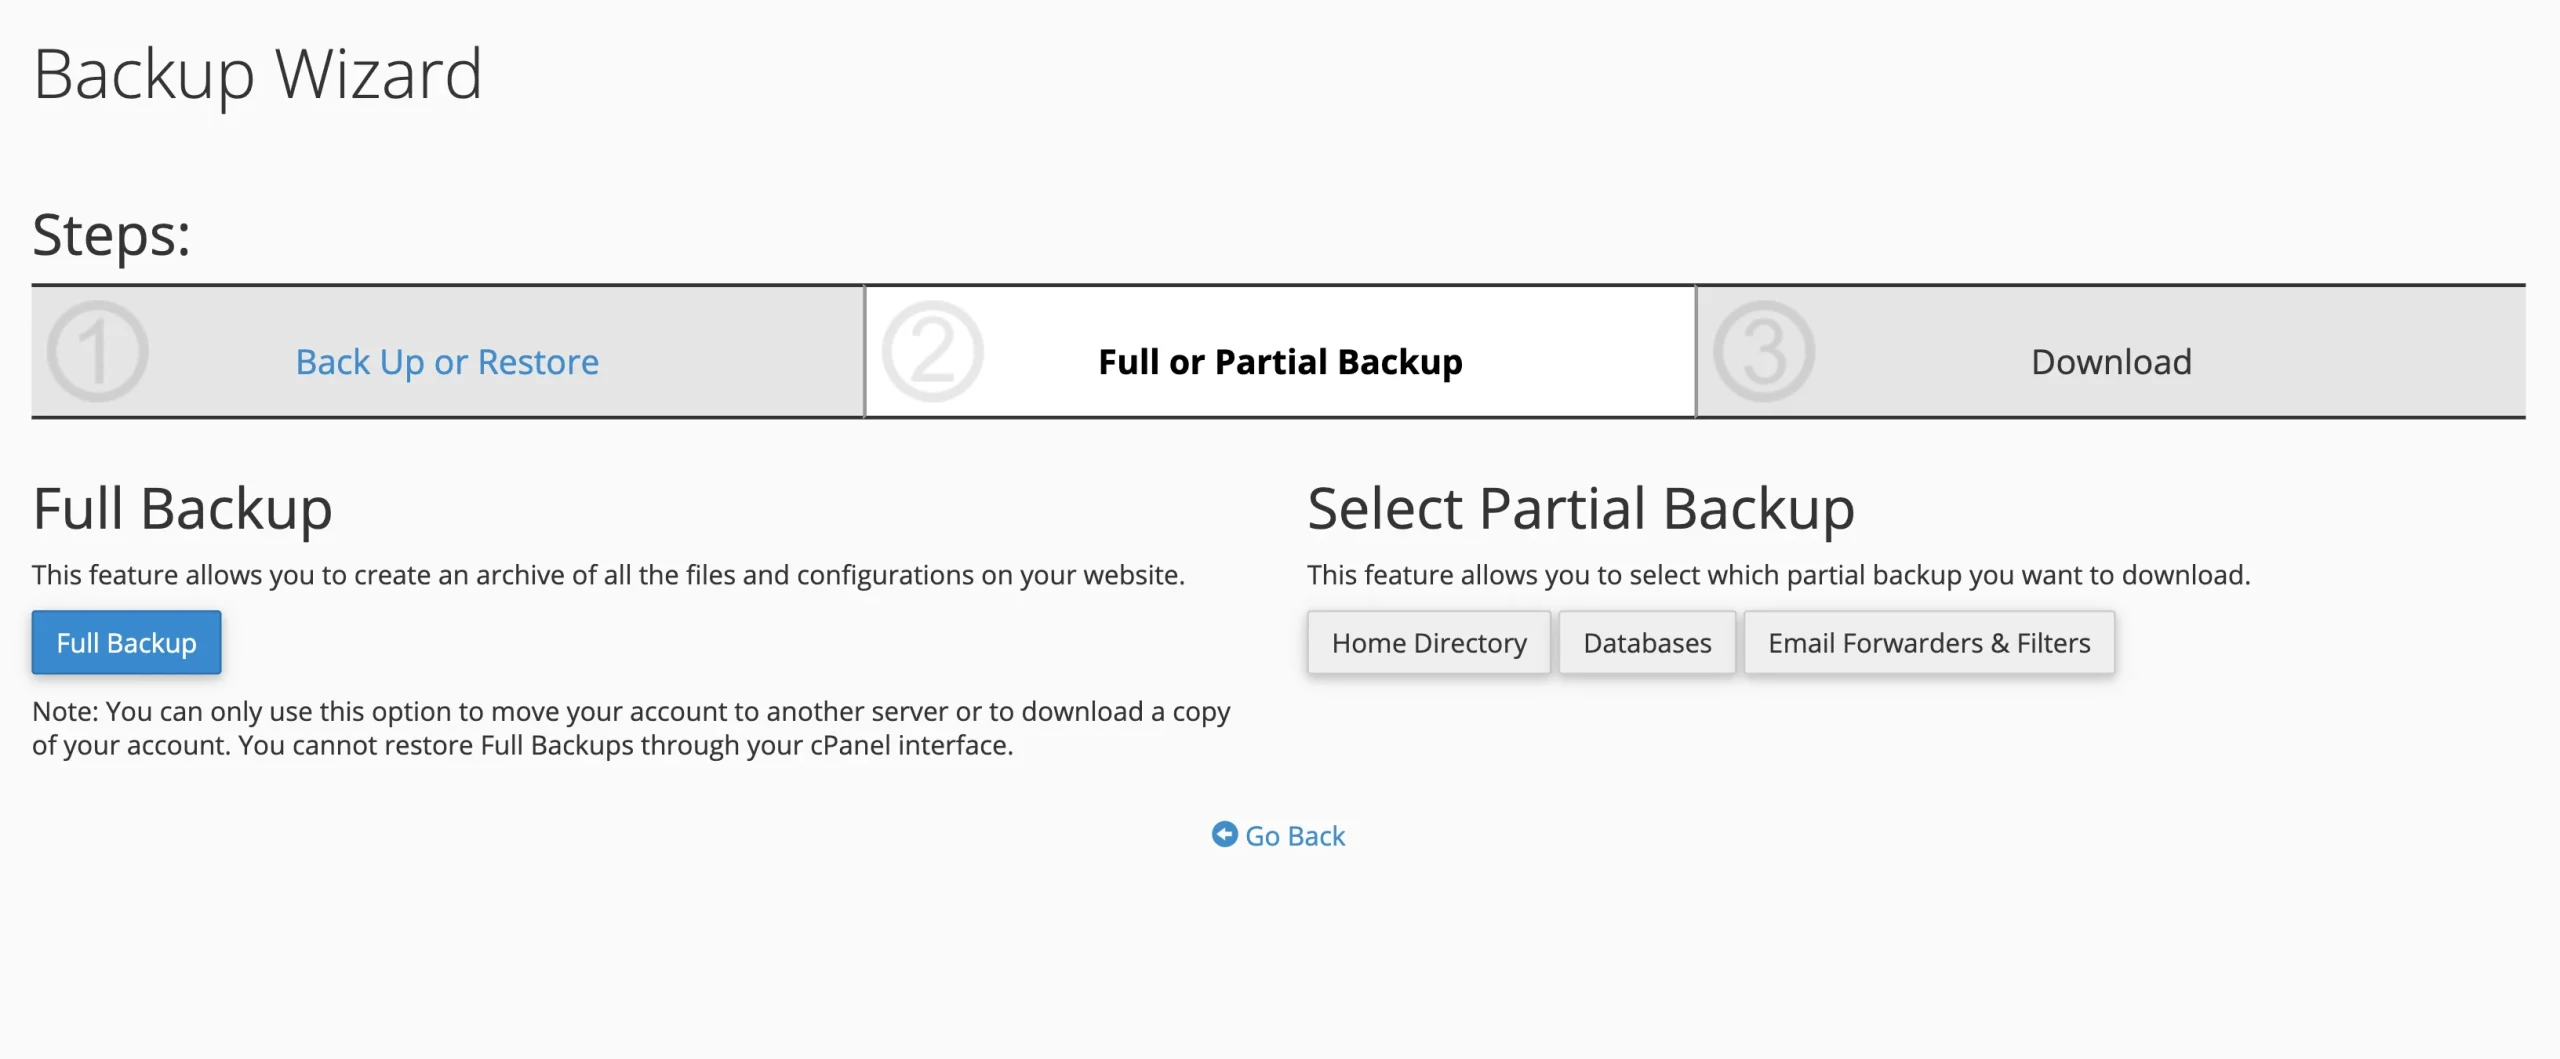
The cPanel Backup Wizard lets you download your website files and database separately. It is useful if you want a copy stored on your computer rather than relying entirely on your hosting provider.
To back up your website:
- Log in to your hosting account and open cPanel.
- Under Files, click Backup Wizard, then select Back Up.
- Choose Home Directory to download your website files as a
.tar.gzarchive. - Return to the backup options and select MySQL Databases.
- Download the database associated with your WordPress website as an
.sqlfile. - Save both files in the same folder on your computer and label them with the backup date.
You now have the two main components needed for a manual restore.
To restore your website:
- Open cPanel and go to Backup Wizard.
- Select Restore and choose Home Directory.
- Upload the matching website files backup and wait for the process to finish.
- Return to Restore, select MySQL Databases, and upload the corresponding database backup.
- Open
wp-config.phpand check that the database name, username, password, and host match your database configuration. - Visit your website and check that the pages, images, and other features load correctly.
There are a few things to watch out for. Your hosting provider may disable the Backup Wizard, and insufficient disk space can cause a backup to fail.
Also, a full cPanel backup generally cannot be restored directly through the Backup Wizard. If you have a full account backup, contact your hosting provider for help restoring it.
2) Back Up and Restore with WordPress Plugins
If you prefer to manage backups from your WordPress dashboard, a plugin is a convenient option. UpdraftPlus, for example, can schedule backups and send them to remote storage, such as Google Drive, Dropbox, or Amazon S3.
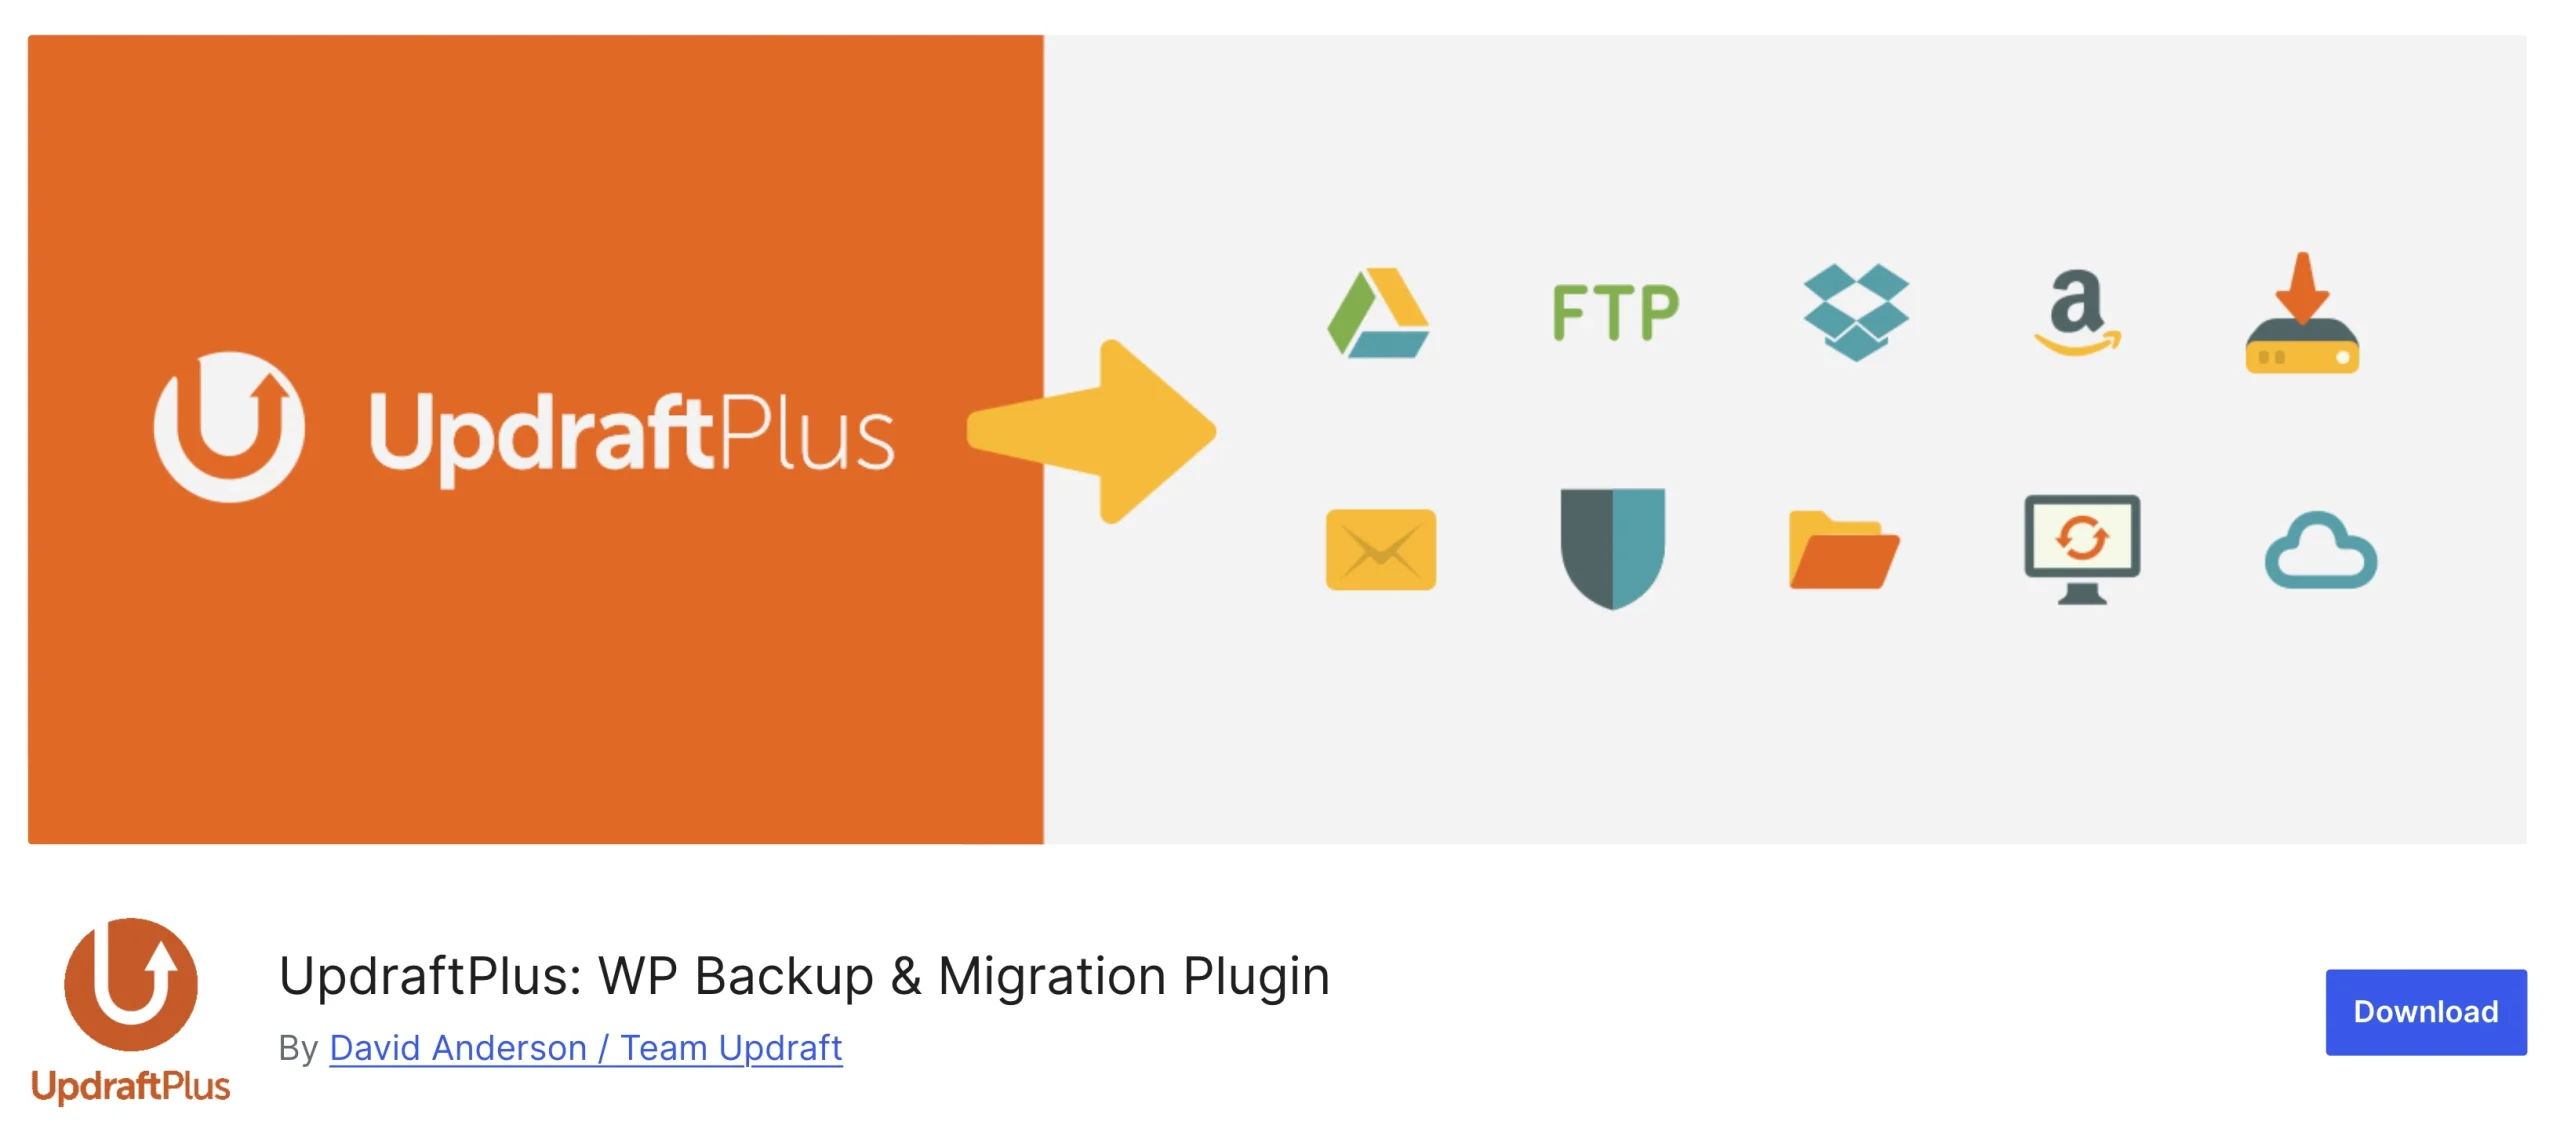
This means you can keep a copy away from your hosting server without downloading every backup manually.
To back up your website with UpdraftPlus:
- Log in to your WordPress dashboard and go to Plugins then Add New.
- Search for UpdraftPlus, click Install Now, and activate the plugin.
- Go to Settings, UpdraftPlus Backups, and open the Settings tab or on the list below Settings, right-click UpdraftPlus and open in new tab.
- Set separate schedules for your database and website files. Daily database backups and weekly file backups are a reasonable starting point for a website with regular content updates.
- Choose a remote storage service, such as Google Drive or Dropbox, and follow the instructions to authorize access.
- Save your settings.
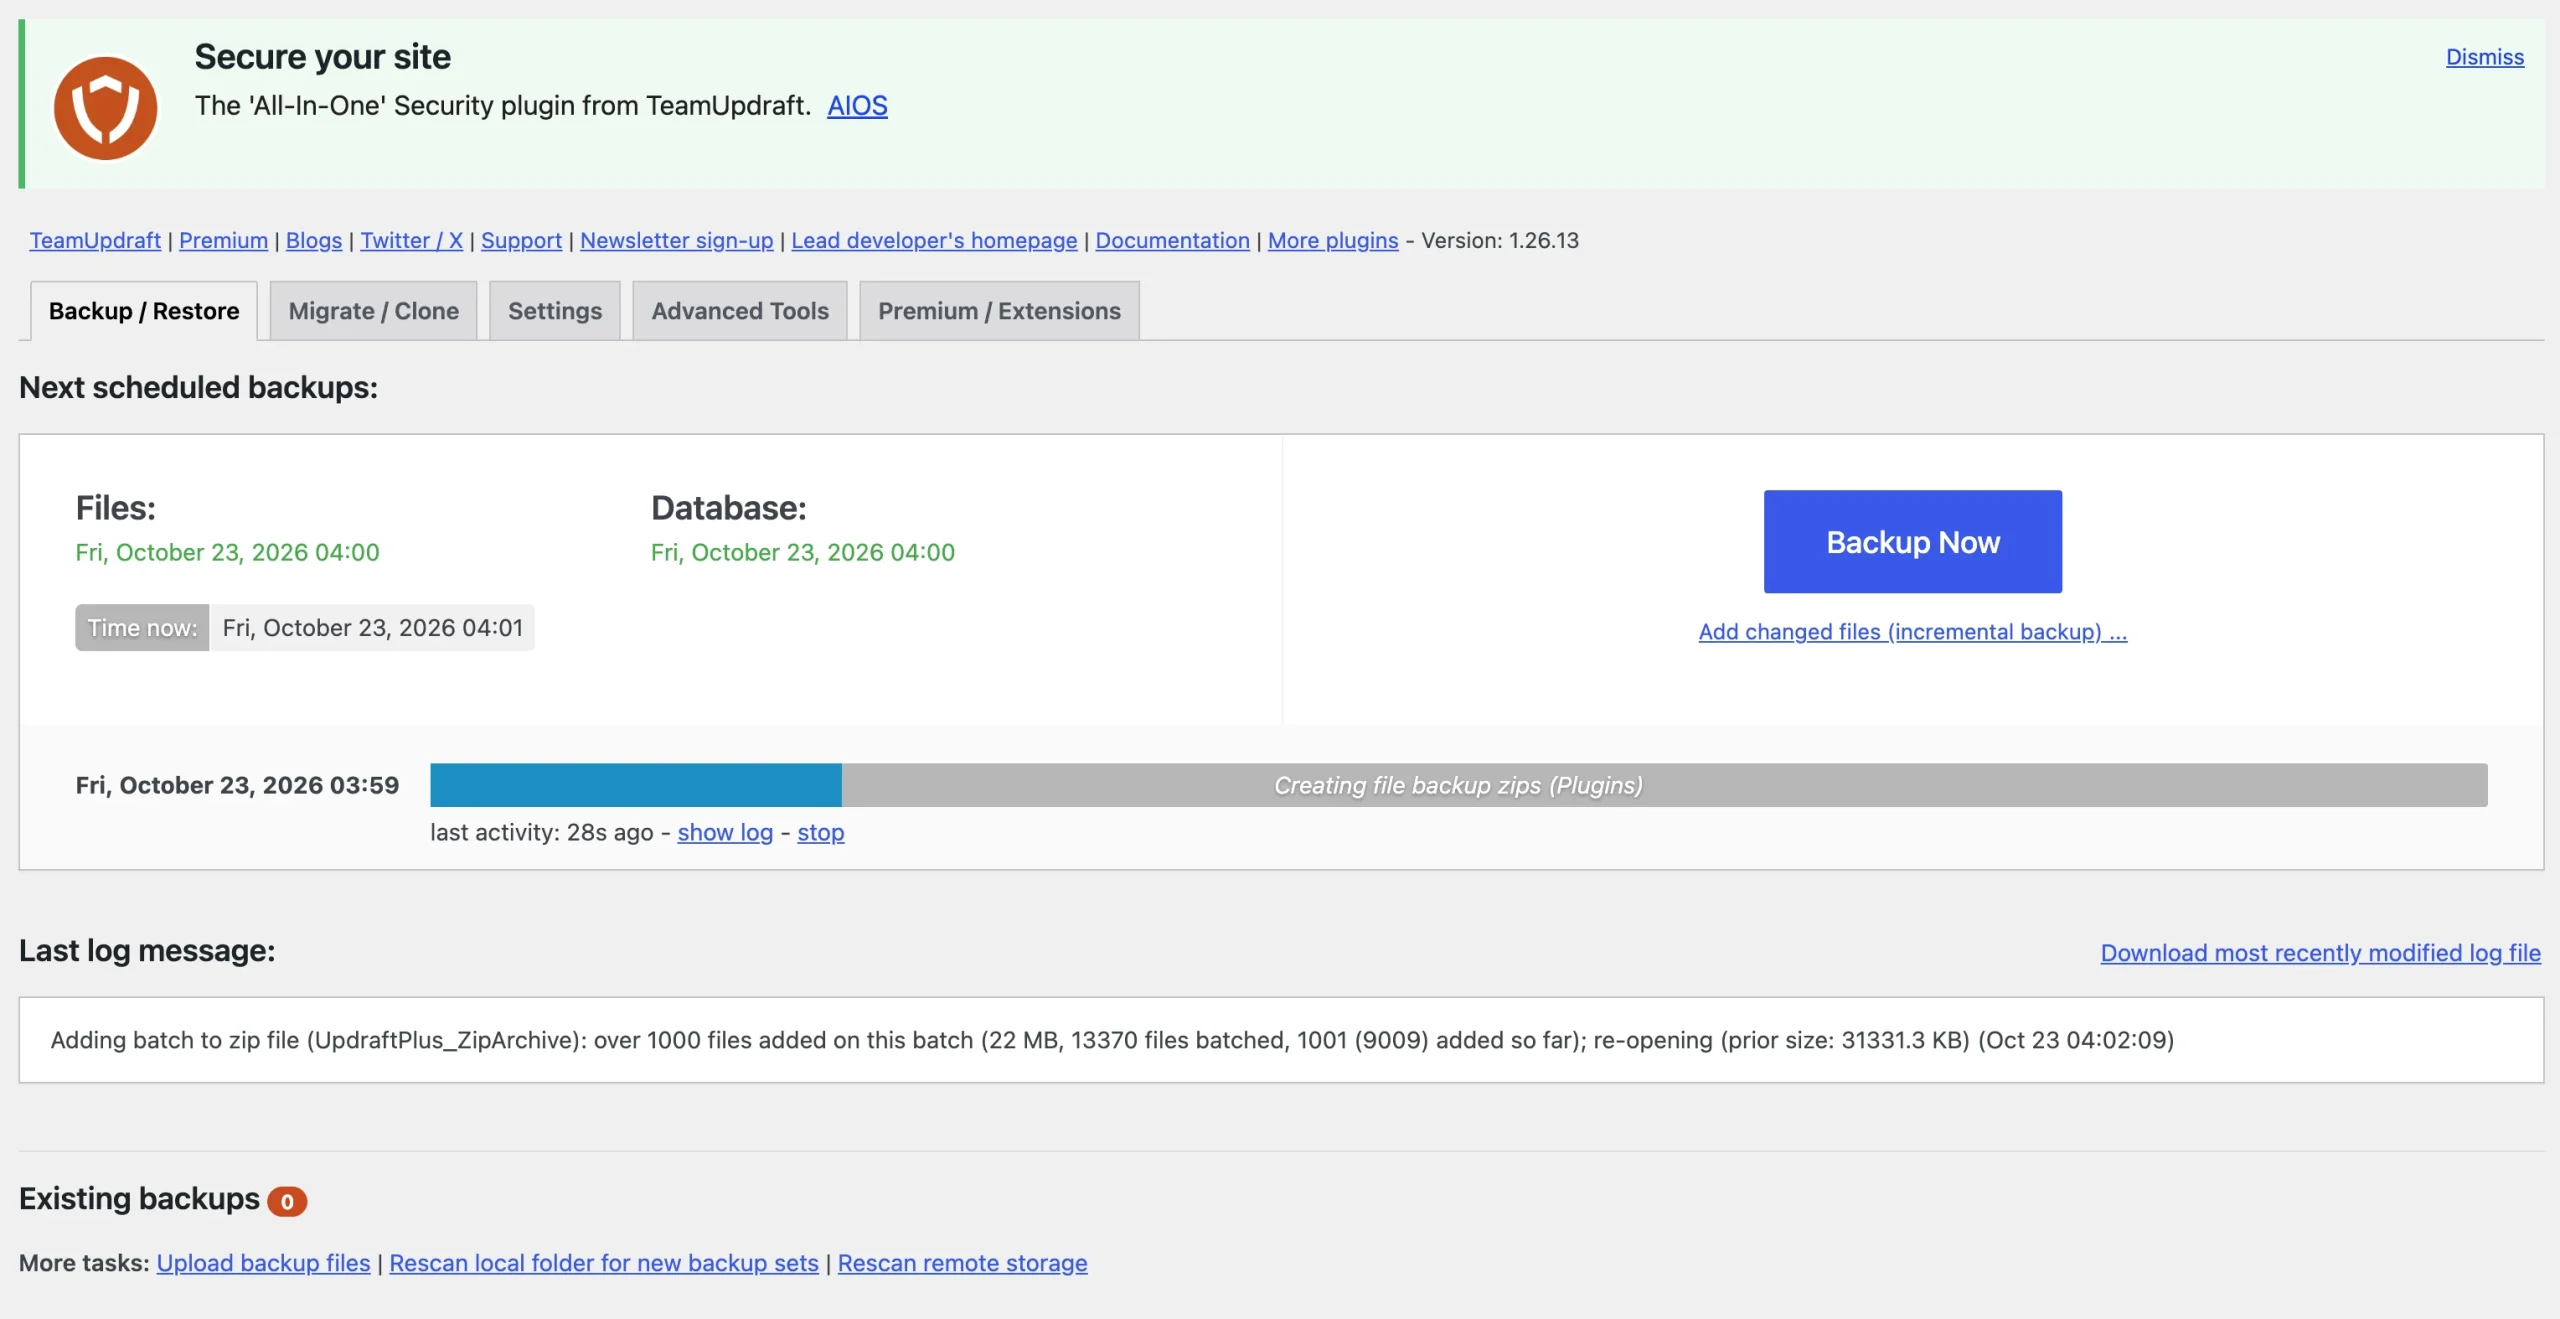
- Open the Backup / Restore tab and click Backup Now.
- Make sure both the database and files are included, then start the backup.
- Once the process finishes, download a local copy if you also want to keep one on your computer.
Adjust the schedule to suit your website. An online store receiving orders throughout the day, for instance, may need more frequent database backups than a small business website that changes only occasionally.
To restore your website with UpdraftPlus:
- Go to Settings, UpdraftPlus Backups, and open the Backup/Restore tab.
- Find the backup you want to use under Existing Backups. If it is not listed, upload your backup files or reconnect the remote storage where they are saved.
- Click Restore beside the selected backup.
- Choose the components you want to recover, such as plugins, themes, uploads, and the database.
- Follow the prompts to start the restoration.
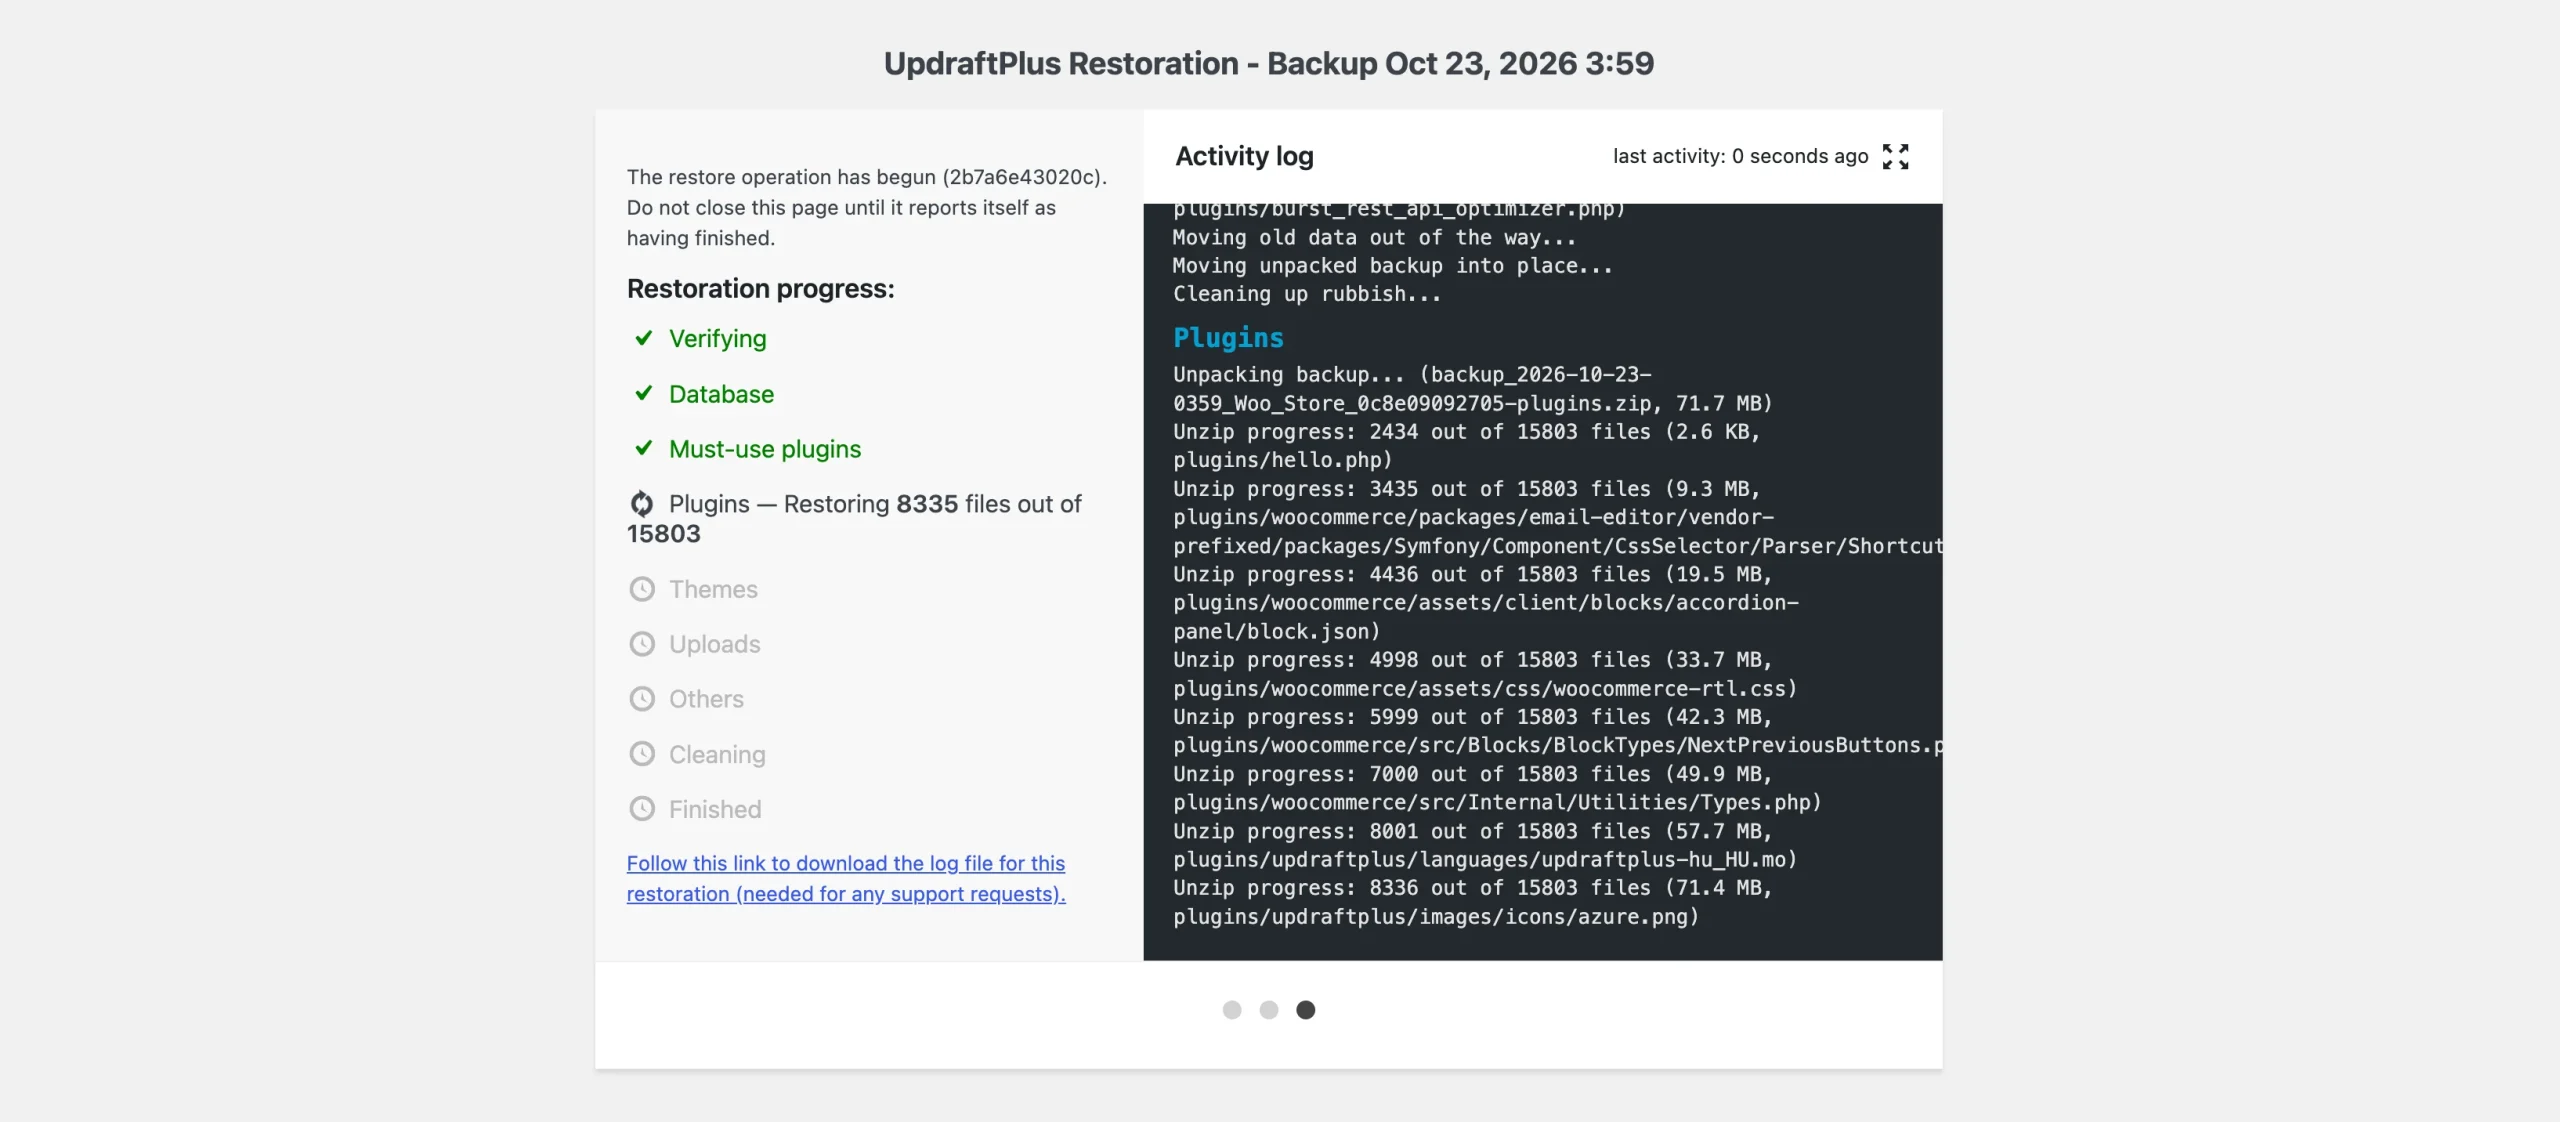
- Wait for the process to finish and check the activity log for confirmation.
- Open your website and test its main pages and features.
If your WordPress dashboard is inaccessible, you may need to reinstall WordPress and the backup plugin before restoring. Keep your backup files safe while doing this, and make sure you have the correct backup set before proceeding.
3) Back Up Manually: Website Files and Database
A manual backup gives you direct control over your website files and database. It is useful if you do not want to install another plugin or need a copy you can transfer to a different hosting account.
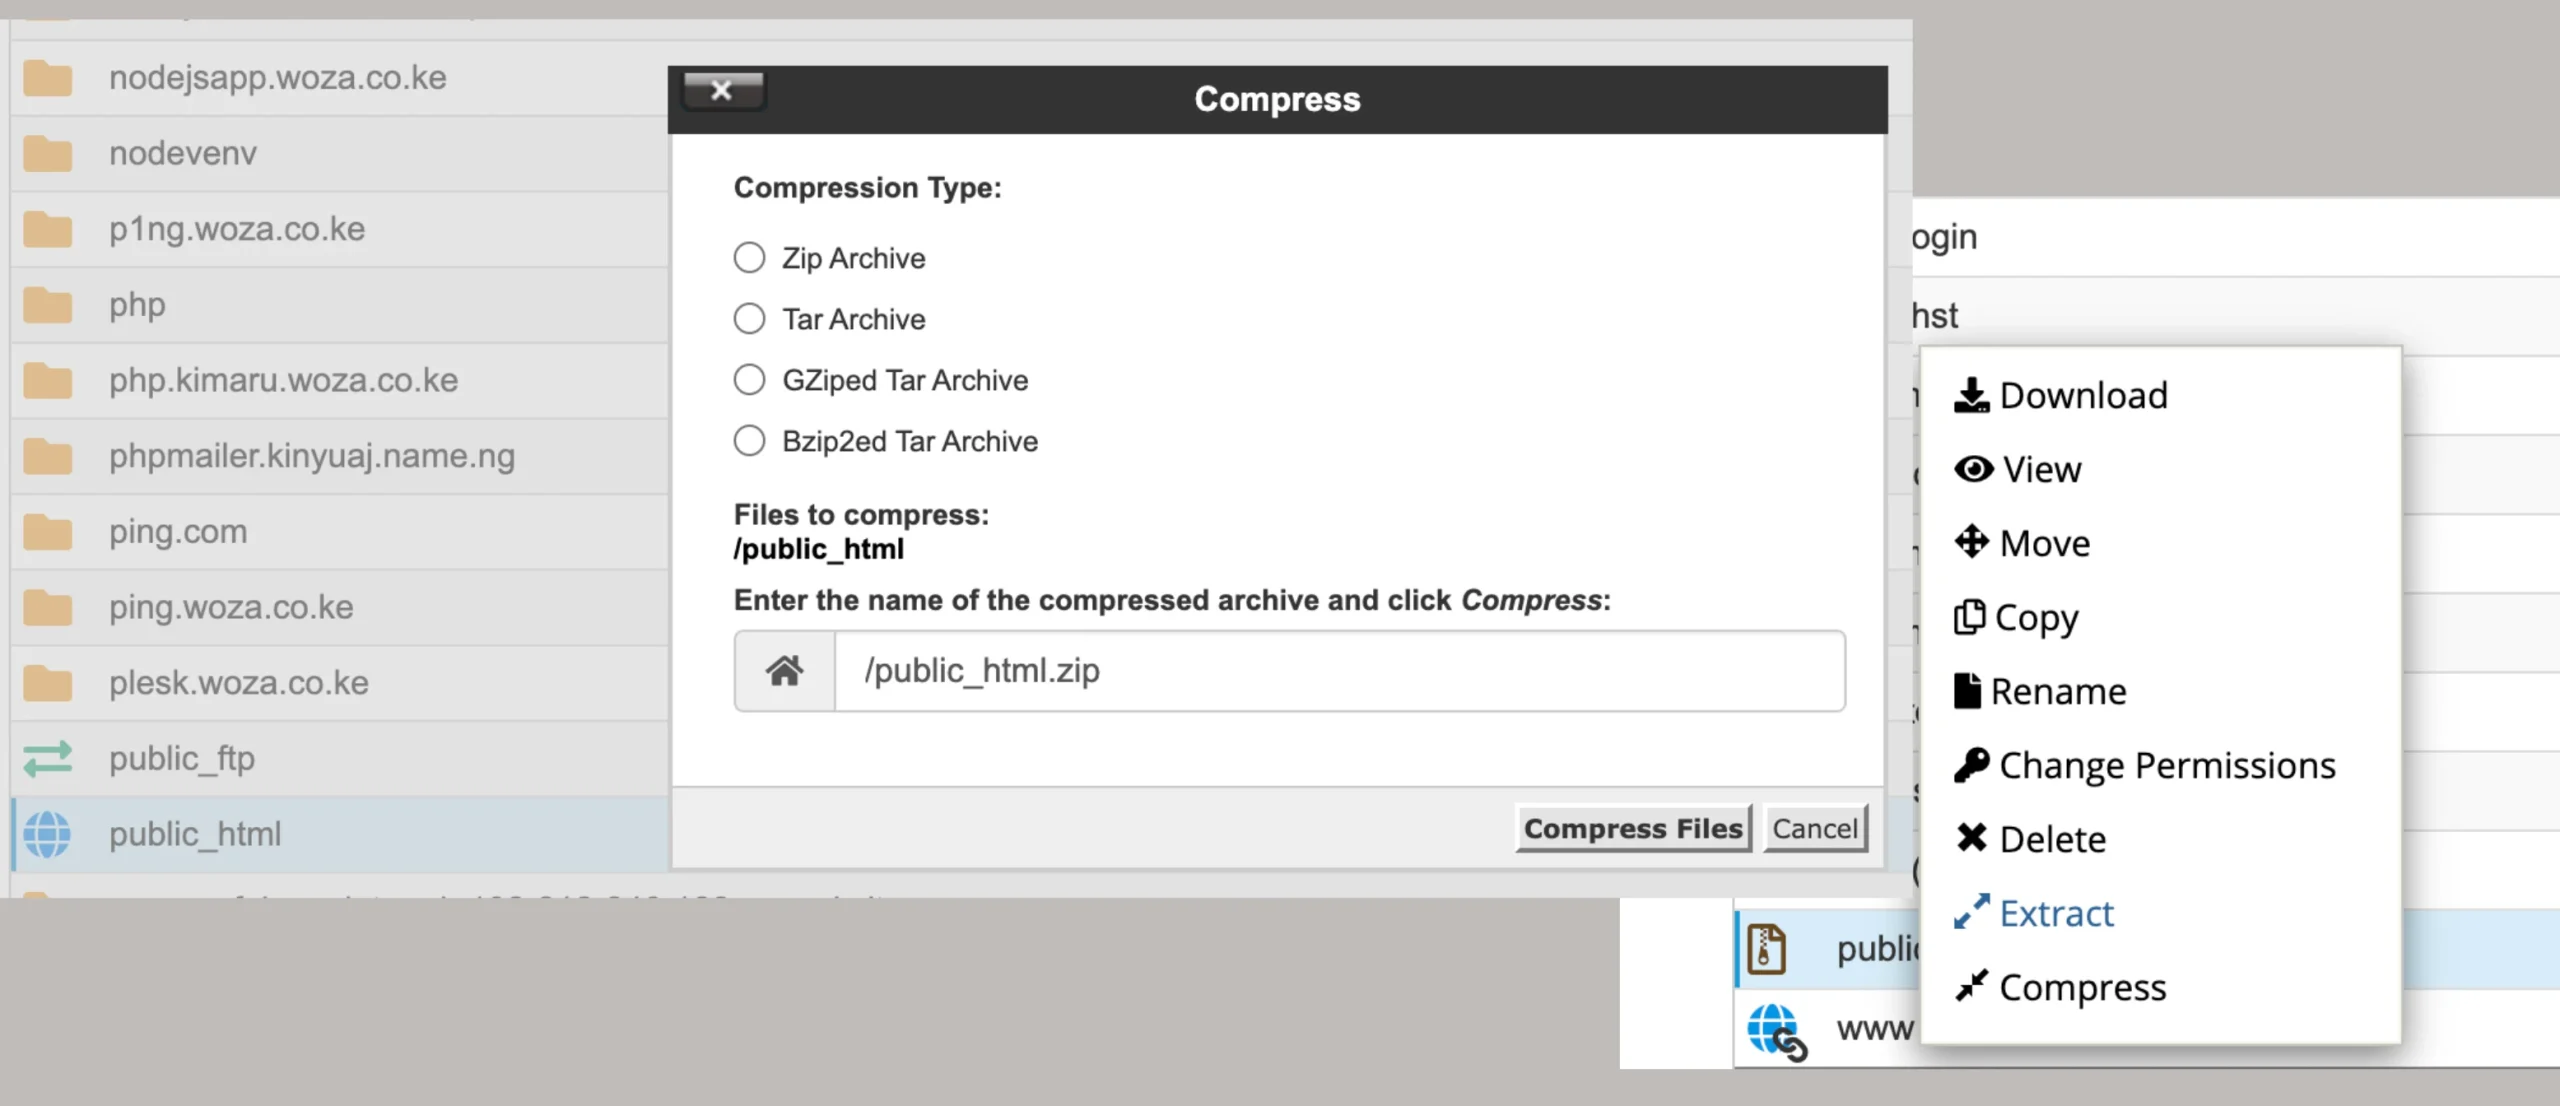
You will use cPanel File Manager to save your files and phpMyAdmin to export your database.
Back up your website files
- Log in to cPanel and open File Manager under Files.
- Locate your WordPress installation. On many accounts, the main website files are stored in
public_html, although your installation may use a different directory. - Select the WordPress files and folders, then use the Compress option to create a ZIP archive.
- Download the archive to your computer and store it somewhere safe.
If you prefer to transfer the files directly, you can use an FTP client such as FileZilla. Choose SFTP where your hosting account supports it, since it encrypts the transfer.
If storage space is limited, prioritize wp-content, wp-config.php, and .htaccess. The wp-content folder contains your themes, plugins, and uploads.
WordPress core files can usually be replaced with a fresh download when necessary, but your custom files and configuration need particular care.
Back up your database
Your website database is stored separately from the files in your WordPress directory, so you must export it as well.
- Open
wp-config.phpand find theDB_NAMEsetting to identify the database used by your website. - Return to cPanel and open phpMyAdmin in the Databases section.
- Select the correct database from the list on the left.
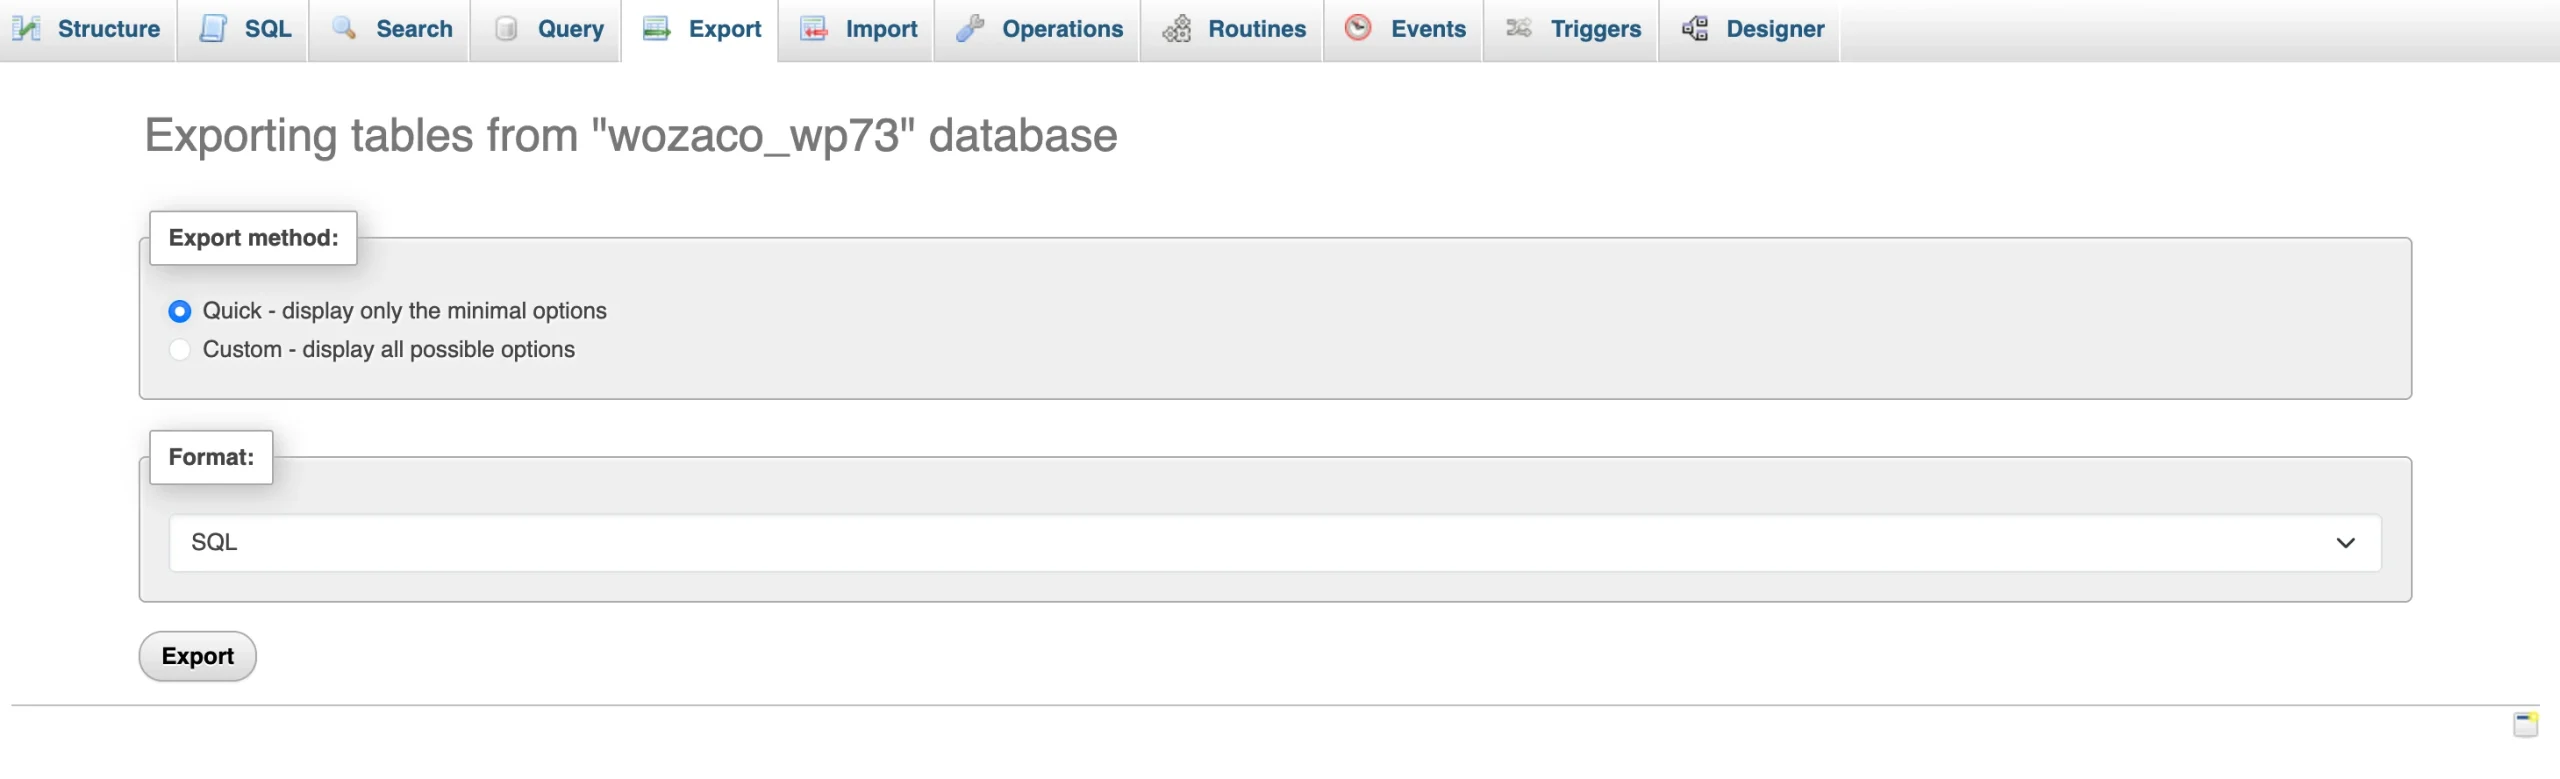
- Click the Export tab.
- Choose Quick to export all tables, or Custom if you need to select particular tables.
- Keep the export format set to SQL. If you choose Custom, you can also select a compression option to reduce the file size.
- Click Export or Go, depending on the interface, and save the file to your computer.
For very large databases, phpMyAdmin may run into time or resource limits. If you have command-line access, mysqldump may be a better option for creating the export.
Restore your website manually
Once you have your files and database backup, you can restore them to your hosting account when you need them.
- Open cPanel File Manager and go to the directory where your website belongs.
- Upload your website backup archive and extract it, or upload the individual files if you prefer.
- If you are moving to a new host or database, create a database and database user first, then grant the necessary privileges.
- Open phpMyAdmin and select the target database.
- Click Import, choose your
.sqlbackup, and start the import. - Wait for the import to finish and check for a success message.
- Open
wp-config.phpand confirm that the database name, username, password, and host are correct. - Visit your website and check the homepage, internal links, images, login page, and forms.
Take care when importing a database into an existing website. The process can overwrite content or conflict with existing tables. Back up the current database before proceeding, and use an appropriate target database for the restore.
If you are restoring after a migration, you may also need to address old domain references or other configuration changes. Check these only after the files and database have been restored successfully.
How Many Backups to Keep and Where
Keeping one backup is better than having none, but it leaves you exposed if that copy becomes corrupted or your hosting account becomes inaccessible.
A useful approach is the 3-2-1 backup rule: keep three copies of your data, use two types of storage, and store one copy off-site.
For a WordPress website, that could mean:
- One copy in your hosting account.
- A second copy in cloud storage, such as Google Drive or Dropbox.
- A third copy on your computer or an external drive.
This arrangement gives you alternatives if your hosting server fails or you accidentally delete a backup. Keep your cloud account secure and avoid leaving every copy in the same location.
Truehost WordPress hosting plans include free daily backups, while the Unlimited plan includes five days of incremental backups. These backups provide a useful first layer of protection, but you should still maintain independent copies that you control.
Your backup schedule should also reflect how often your website changes. A relatively static business website may be fine with weekly backups, while a busy blog, membership website, or online store may need daily or more frequent copies.
Database backups deserve particular attention because they capture new posts, customer orders, comments, and other recent changes.
Always create a fresh backup before updating WordPress, installing major plugin updates, changing themes, or migrating your website. If something goes wrong, you will have a recent recovery point rather than having to rebuild changes made over several days or weeks.
How Long Does a WordPress Restore Take?
There is no single restoration time that applies to every WordPress website. A small website with a modest database may be restored much faster than a large online store with thousands of images and frequent database changes.
A few factors affect the time you should allow.
- Database size: A large database takes longer to upload and import. Very large databases may need a command-line tool rather than phpMyAdmin.
- File size: Websites with extensive image libraries, videos, or other media take longer to transfer. Your internet speed also affects download and upload times.
- Available disk space: If your hosting account is close to its storage limit, creating or extracting a backup may fail. You may need to free up space before continuing.
- Restore method: Restoring from a backup already available on the server can avoid downloading and uploading the full archive. A manual restore from your computer involves transferring the files and importing the database.
There may also be additional work after the restoration, such as correcting database settings, checking domain references, or fixing a plugin conflict.
Rather than relying on a general time estimate, test your backup on a staging website. Record how long downloading, uploading, importing, and checking the restored site takes. You will have a more useful recovery estimate for your own website.
How to Test a WordPress Backup
A backup is only useful if it can be restored successfully. A file sitting on your computer or in cloud storage does not prove that your website can be recovered from it.
Testing gives you a chance to catch missing files, incomplete database exports, and restoration problems before they affect your live website.
Here is a simple test you can run in an afternoon:
- Create a fresh backup. Use the method you rely on most and confirm that both the website files and database are included.
- Restore it to a staging site. Use a separate test installation or staging environment rather than experimenting on your live website.
- Record the time taken. Note how long each stage takes, including downloading, uploading, extracting files, and importing the database.
- Check your main pages. Open the homepage, several posts or product pages, and the login page.
- Check images and interactive features. Confirm that images load and that contact forms, order forms, and other important functions work. Use test submissions rather than placing real orders.
- Check for page errors. If your restored pages return errors, clear the relevant cache and, where necessary, resave your permalinks under Settings, Permalinks.
- Record any problems. Write down the steps needed to complete the restoration and correct any issues you encounter.
A staging environment should be kept separate from your live website, especially if it contains customer information. Avoid sending real customer notifications or processing live payments during testing.
Repeat the test periodically and after making major changes to your backup process. If you depend on automatic backups, occasionally check that new copies are being created and that the files are accessible.
Protect Your WordPress Website with Truehost Hosting
A reliable backup routine helps you recover from website errors without losing valuable content.
The important part is having recent copies of both your website files and database, storing them safely, and checking that they can be restored.
Truehost WordPress hosting plans include free daily backups, giving you a starting point for protecting your website.
Go through our plans to find a hosting package for your WordPress website.
Combine your hosting backups with independent copies and regular restore tests for added protection.
When choosing hosting for a WordPress website, select one that suits your site’s storage, performance, and backup needs.
