When writing an email with an attachment, you need to make sure that the recipient knows there is an attachment, knows what it’s about, and is able to find and open the document to see the contents without issues.
A solid routine can help you make sure your email and attachments check all these requirements, and the process feels simple enough for you and the email recipient.
Here is the whole routine in five lines:
- Attach the file first.
- Give it a clear name.
- Write a specific subject line.
- Mention the attachment in your first sentence.
- Tell the recipient what to do and by when.
Let’s go through the process in detail.
How to Write an Email with an Attachment, Step by Step
The process takes six steps, and it works the same in Gmail, Outlook, or the webmail that comes with your hosting.
Step 1: Attach the File First
Have you ever written an email saying that a document is attached, only to discover that you forgot to add it? It is an easy mistake to make, especially when you are rushing to send a message.
The simplest way to avoid it is to attach the file before writing the email.
Open a new message, select the attachment option, and add the document you want to send. Then wait until the file name or a thumbnail appears under the message box before continuing. This confirms that the file has been added to the message.
In Gmail, click “Compose,” select the paperclip icon at the bottom of the window, choose your file, and click “Open.” You can also drag an image into the message.
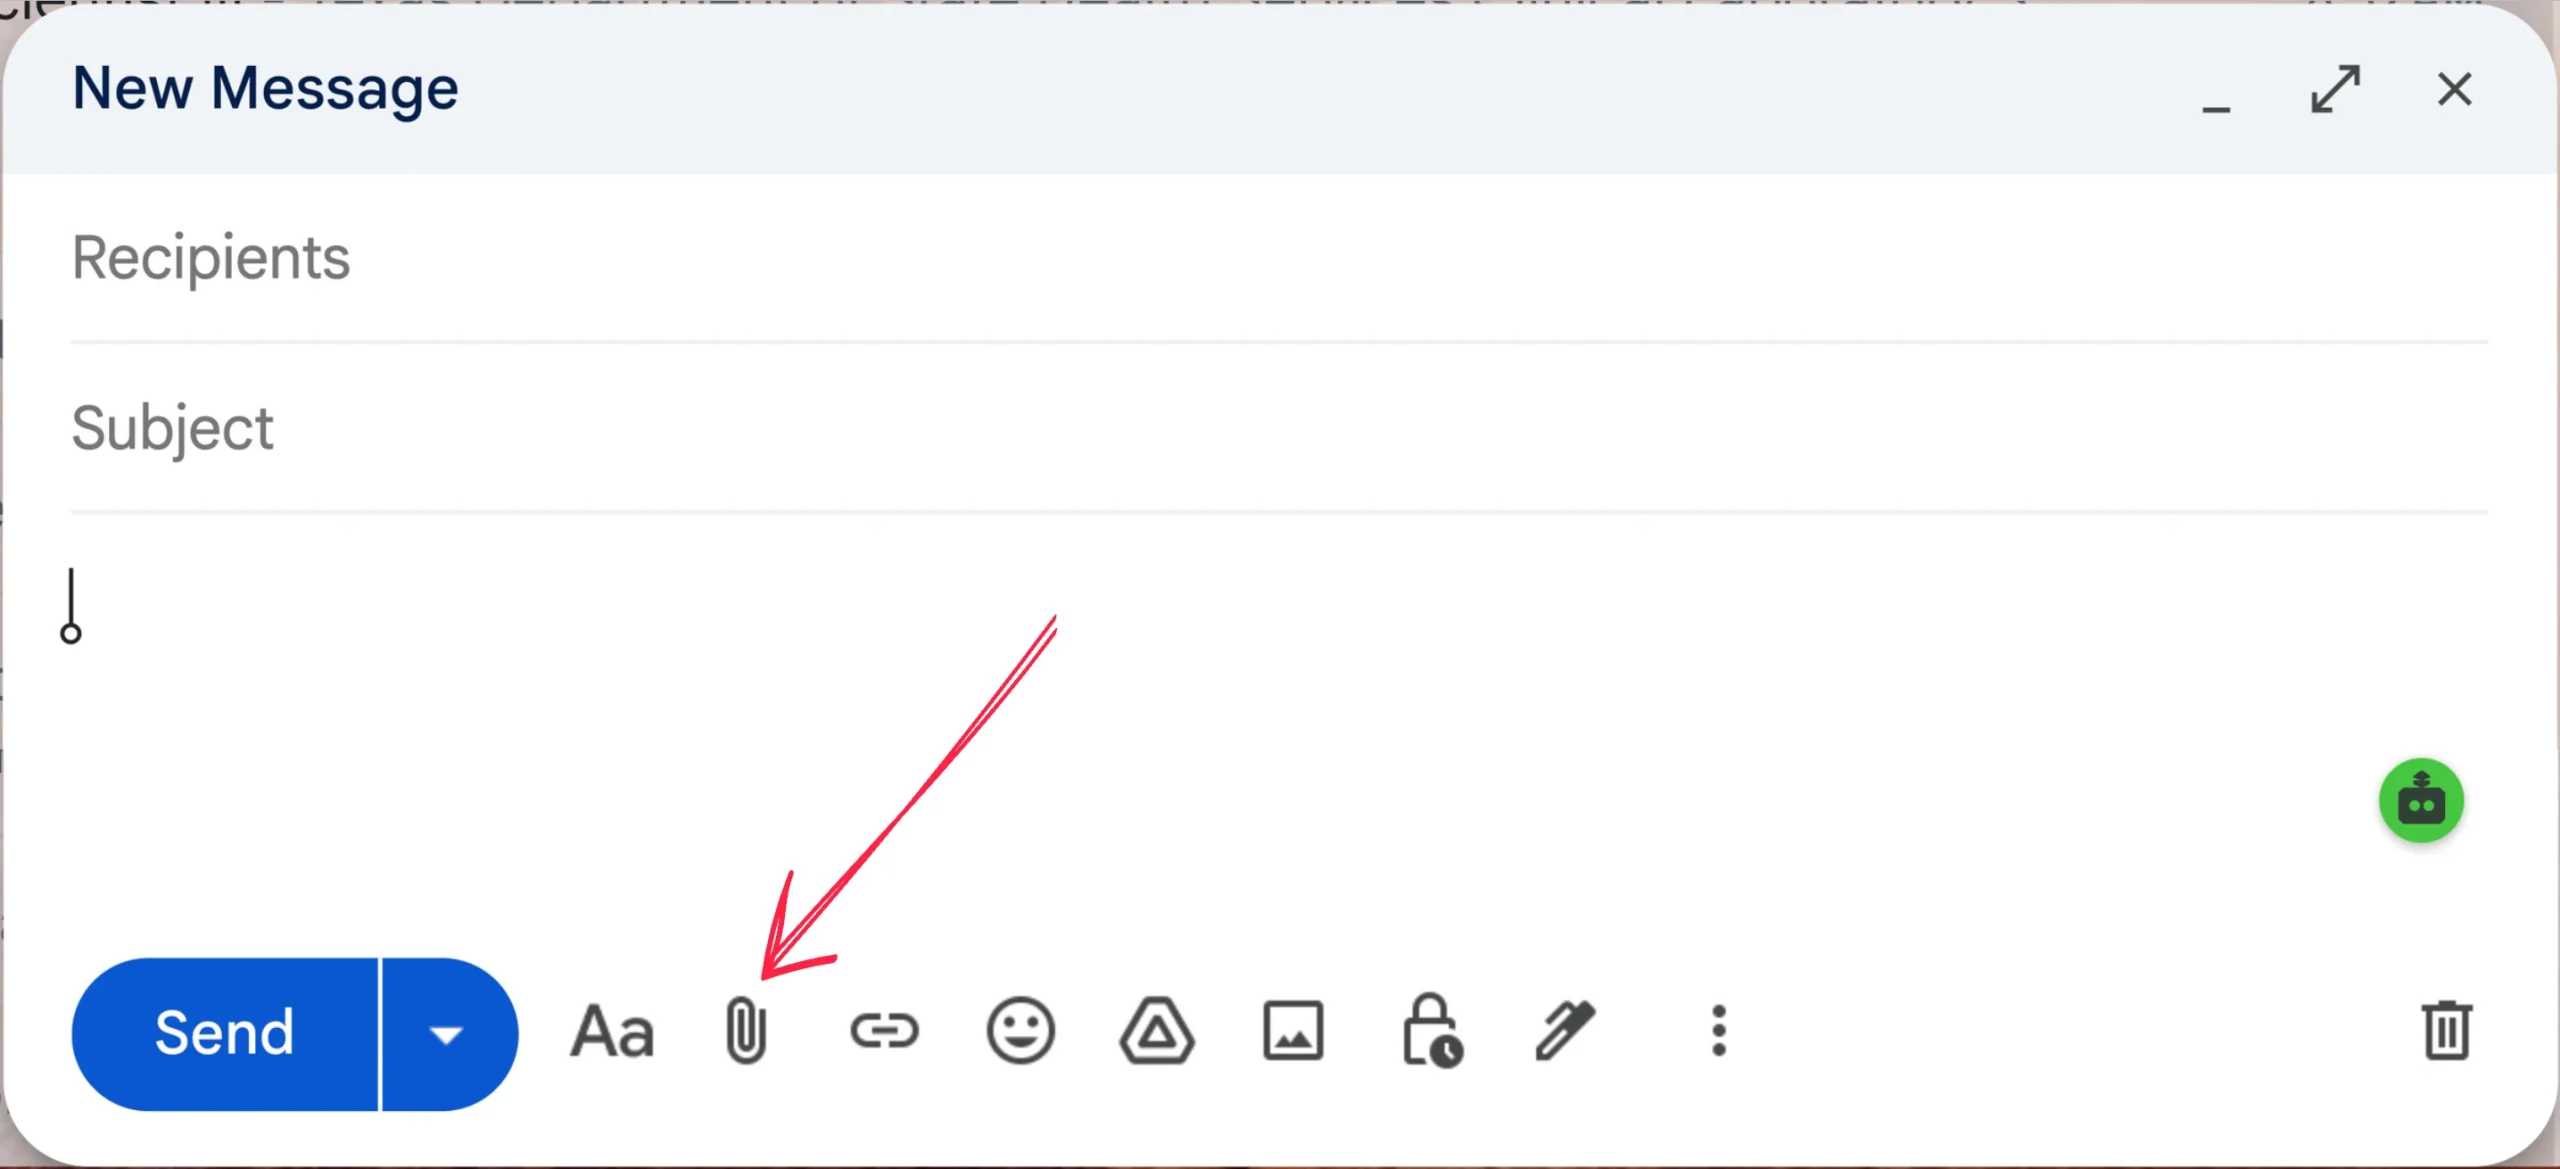
Most other email apps have a paperclip or an “Attach” button too.
Step 2: Name the File Intentionally
The file name is what your reader sees when they open the email and again months later in their downloads folder. Make it say something.
Instead of using names such as Document1.pdf, scan0021.pdf, or final_final2.docx, include details that identify the file.
For example:
- Include a name and document type:
Jane-Nakato_CV.pdfworks well for a job application. - Add a date or version number when it changes:
Q3-Sales-Report_v2.pdfhelps distinguish a revised report from an earlier copy. - Avoid vague or confusing names: They tell the reader nothing and are hard to find later.
The file format also deserves attention. PDF is a practical choice for CVs, invoices, and reports because it generally preserves the layout across phones and computers. If the recipient needs to edit the document, send a Word or Excel file instead.
Before attaching the file, open it to confirm that it contains the correct information and is the version you intend to share.
Step 3: Write a Short and Descriptive Subject Line
The subject line gives the recipient an idea of what your email is about before they open it. A useful one identifies the document, the purpose of the message, or the action required.
Keep it short, but include enough detail to make the email easy to recognize.
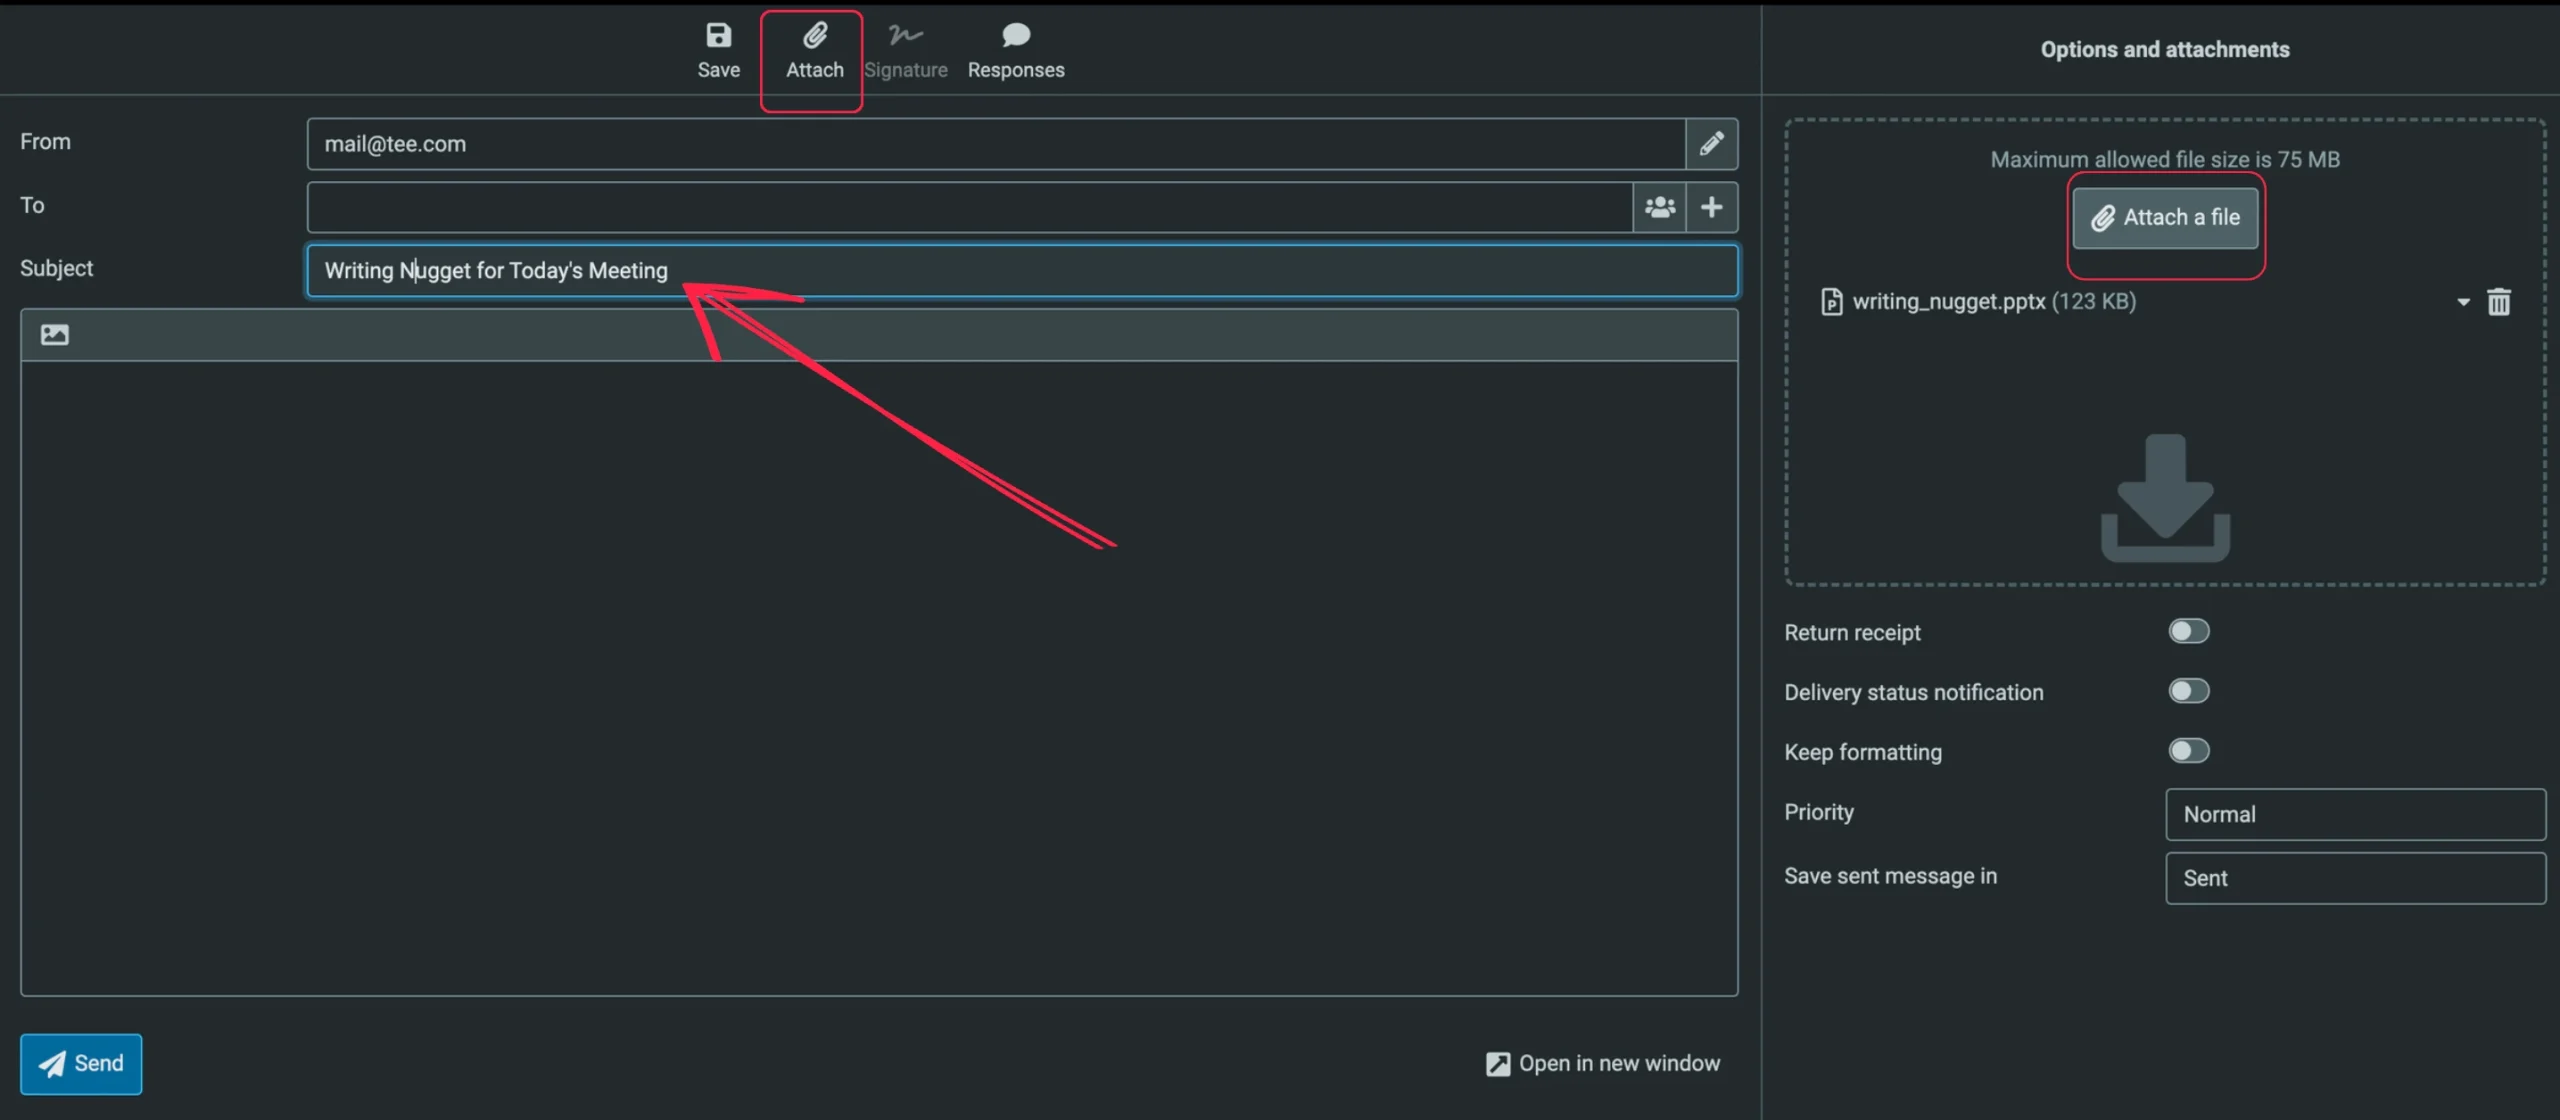
Boomerang, an email tool, analyzed email responses and found that response rates peaked for subject lines containing three to four words.
This finding supports keeping subject lines concise, although a longer subject may be more useful if it explains the purpose clearly, and a short subject that says nothing is still a bad subject.
Here are a few examples:
| Weak subject | Better subject |
|---|---|
| Hello | CV – Accounts Assistant |
| Documents | Invoice 0042 for July (PDF attached) |
| Update | Sales Report for Review by Friday |
Include a deadline if the recipient needs to prioritize the message. Webmail lets you set the level of priority. You can also mention the file format in brackets when it helps identify the attachment.
For example, if you are submitting an invoice, July Invoice 0042 (PDF) tells the recipient more than Invoice does.
Step 4: Open with a Sentence That Points to the File
Your first sentence should tell the recipient which file you have attached and what is in it. This saves them from guessing which document to open or why it is in their inbox. It’s also hard to miss from there.
A simple pattern works every time: Attached is + the file + what it contains.
| Weak | Better |
|---|---|
| See attached. | Attached is invoice 0042 (PDF, one page) for July’s design work. |
| Find the documents. | I’ve attached my CV and cover letter, both in PDF format, for the Accounts Assistant position. |
| Please check. | The revised sales figures are on page 2. Could you please confirm the totals by Friday? |
So, you state that the file is attached, identify it, and briefly explain its contents. If you are sending several documents, mention each one.
When sending a lengthy report, direct the recipient to the relevant section or page. This small detail helps the recipient get to the information they need without searching through the entire document.
It also gives you another chance to check that the file is attached. If your opening sentence refers to two documents, confirm that both appear beneath the message before sending.
Step 5: Say What You Want Done, and By When
An email may identify the attachment clearly but still leave the recipient wondering what to do with it. If you need them to take action, state your request directly.
Use a clear verb such as review, sign, approve, pay, or reply. Add a specific day or date if you have a deadline, not “soon.”
For example:
Weak: Let me know what you think.
Better: Please review the attached proposal and send your comments by Friday.
The second message identifies the task and gives the recipient a deadline. This makes it easier for them to plan their response.
If you need a signature or approval, say so in the email rather than expecting the recipient to work it out from the attachment.
You may not need a response at all. In that case, make it clear:
No reply is needed; this document is for your records.
That saves the reader from wondering if they’ve missed something.
Step 6: Keep the Rest Short, Then Sign Off
Your attachment contains the main details, so the email itself only needs to explain why you are sending the file and what should happen next.
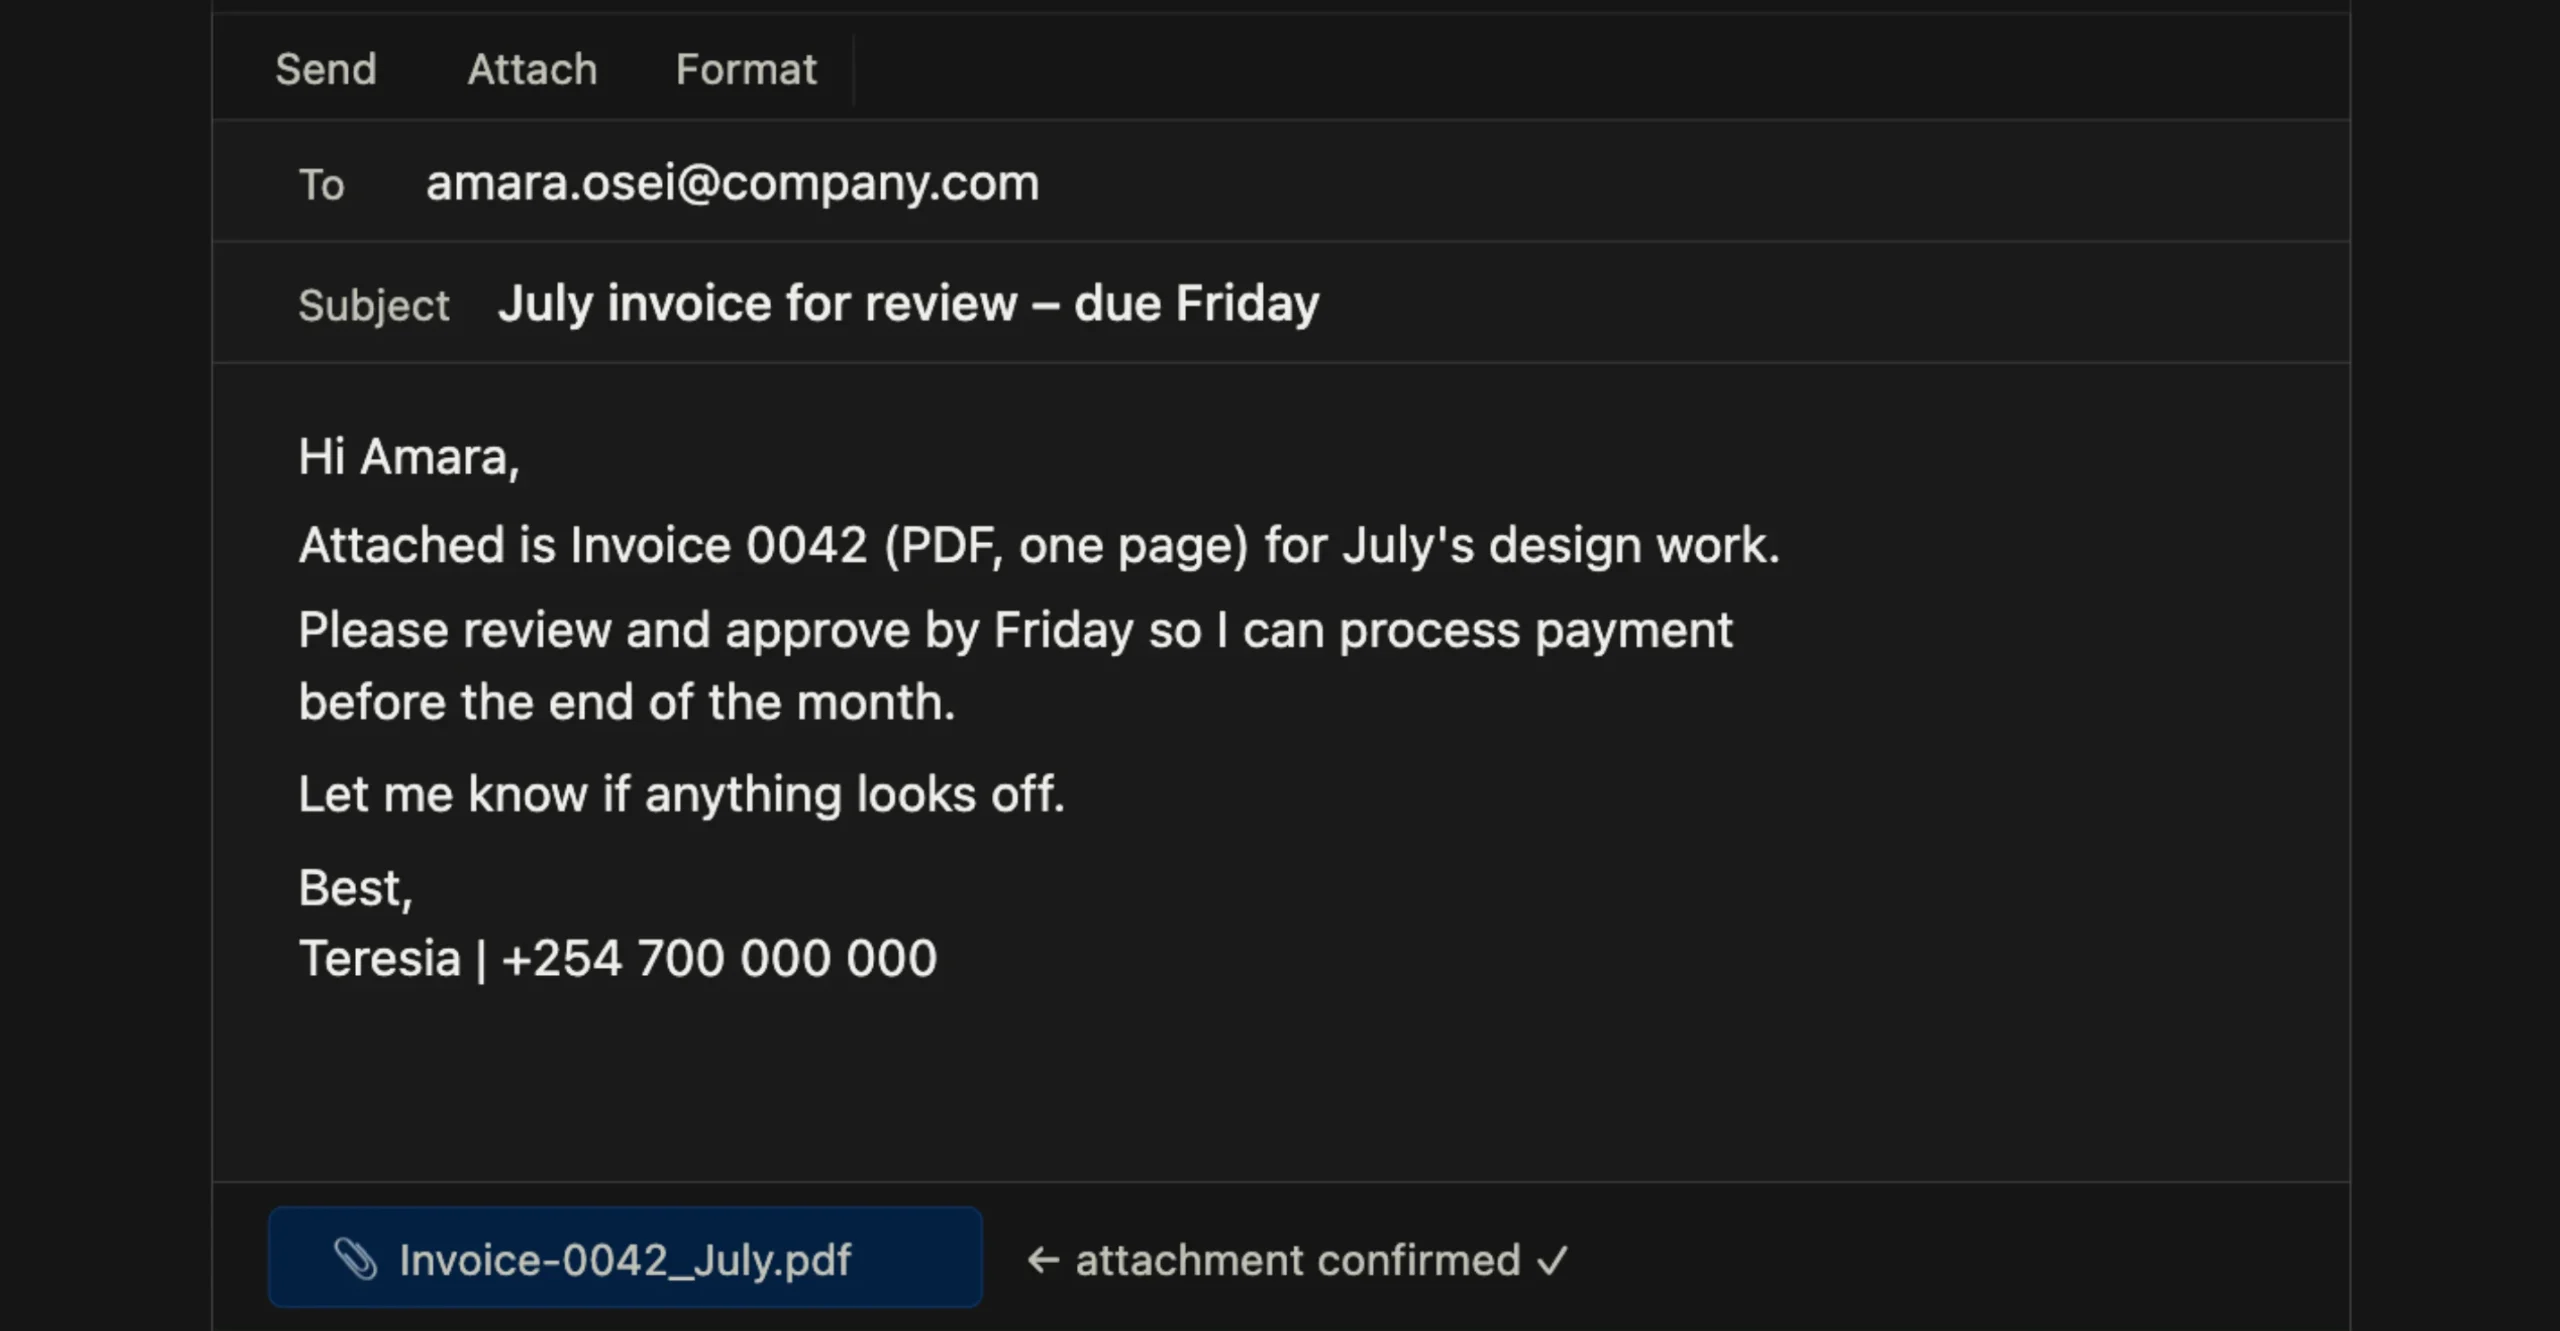
Aim for three to five short sentences, with one main idea in each paragraph. Use familiar words and avoid long explanations that repeat information already covered in the document.
Boomerang’s analysis also reported higher response rates for emails written at a third-grade reading level than for those written at a collegiate level. So plain words get answers.
This does not guarantee a reply, but it supports a useful habit: making your message easy to read and act on.
Use a polite closing that suits your relationship with the recipient. For professional emails, include your job title, business name, or phone number where relevant.
Before clicking Send, check three things: the attachment appears beneath the message, your opening sentence identifies the file, and the recipient’s email address is correct.
How to Check if the Email Went Through with the Attachment
Once you have written the message, take a moment to check that both the email and the attachment have been sent correctly.
a) Check before sending.
Look for the file name or thumbnail beneath the message and reread the subject line.
Some versions of Outlook can warn you when your email mentions an attachment but no file has been added. However, this reminder is not available in every email application, so check manually.
b) Review the sent message.
After sending, open the email in your Sent folder and confirm that the attachment appears. This gives you a quick way to check what was included in the message.
c) Ask for confirmation when necessary.
If the document is important, ask the recipient to confirm that they received it and can open it.
Read receipts only work on Google Work or school accounts, not personal @gmail.com addresses. The recipient may need to approve them, and Google says a receipt doesn’t always mean the message was read.
So add a line for the recipient to confirm they can open the file in your email text.
d) Check for delivery problems.
If the email bounces or the attachment is rejected, review the file size and format. You may need to compress an accepted file, use an approved cloud-sharing link, or choose another file-transfer method permitted by the recipient’s organization.
These checks are particularly useful when sending invoices, contracts, applications, reports, or other documents that someone needs to act on.
Mistakes That Get Attachments Ignored or Blocked
A few common slip-ups can make your email less effective or stop the attachment from getting through at all.
- A vague subject line. Subjects like “Hello” or “See attached” give the reader no reason to open the email. Name the document or the required action.
- Sending the wrong version. Check the document’s contents, the file name, and the date before you hit Send. Names like
final_final2.docxare a warning sign that you may not be sending what you think.
- Using a blocked file type. Email providers restrict certain formats they consider unsafe. Gmail blocks formats such as
.exe,.js,.msi, and.iso, including files hidden inside archives, and it will also block password-protected archives. Outlook keeps its own list of restricted types. Renaming or compressing a blocked file won’t get it through either.
- Sending the email to the wrong person. Read the address again before you send, especially when the file contains identification records, payslips, or contracts.
A short review before sending can save you from having to explain a mistake or send the email again.
Send Emails from an Address That Matches Your Business
A well-written email and a clearly named attachment help you communicate professionally. Your email address can support that impression too.
So, everything above lands better when the email comes from [email protected] instead of a free address. It tells the reader a real business is behind the file.
At Truehost, our email hosting services let you set up branded business email addresses with webmail, mobile and desktop access, anti-spam and virus protection, and shared calendars and contacts.
You can also review the available plans on our Workplace Emails page.
If you send emails for your business, use Truehost email hosting to set up a professional email address that matches your domain.
