Your website is published and ready, but when you share the link, visitors see a long Google Sites address instead of your own domain name.
Connecting a custom domain to Google Sites lets you use an address like www.yourbusiness.com instead of the default Google Sites URL. You’ll need to verify domain ownership, update DNS records, and connect the domain to your published website.
This article explains how to connect your domain, set up the version without www, and fix common problems. No coding is required. You just need to copy a few values from Google into your domain’s DNS settings.
DNS (Domain Name System) translates domain names like yourbusiness.com into the addresses computers use to find websites. DNS records are managed by your domain’s DNS provider. This guide covers two types: TXT records and CNAME records.
Don’t have a domain yet? Search and register your domain with Truehost Uganda
What You Need Before Connecting a Custom Domain to Google Sites
Before you begin, make sure you have the following:
1) A published Google Site: Your website must be published, and its sharing settings must allow public visitors to view it. Otherwise, visitors may be redirected to the original Google Sites address.
2) A registered domain name: For example, yourbusiness.com.
3) Access to your Google account: You must be the owner of the Google Site to connect a custom domain.
4) Access to your DNS settings: Know which company manages your domain’s active nameservers. Nameservers are the servers that tell the internet where your domain’s DNS records are kept. This might be your registrar, hosting provider, or a separate DNS service. The records must be added where the nameservers point, because changes made anywhere else have no effect.
5) Permission to manage DNS records: You need to add a TXT record for verification and a CNAME record for your website.
6) The correct Google account type: Personal Google accounts and Google Workspace accounts can have different setup requirements. If you use a work or school account, your administrator may need to configure the domain through the Google Admin console.
You can also review Google’s official guide to using a custom domain with Google Sites before starting.
How to Connect a Custom Domain to Google Sites Step by Step
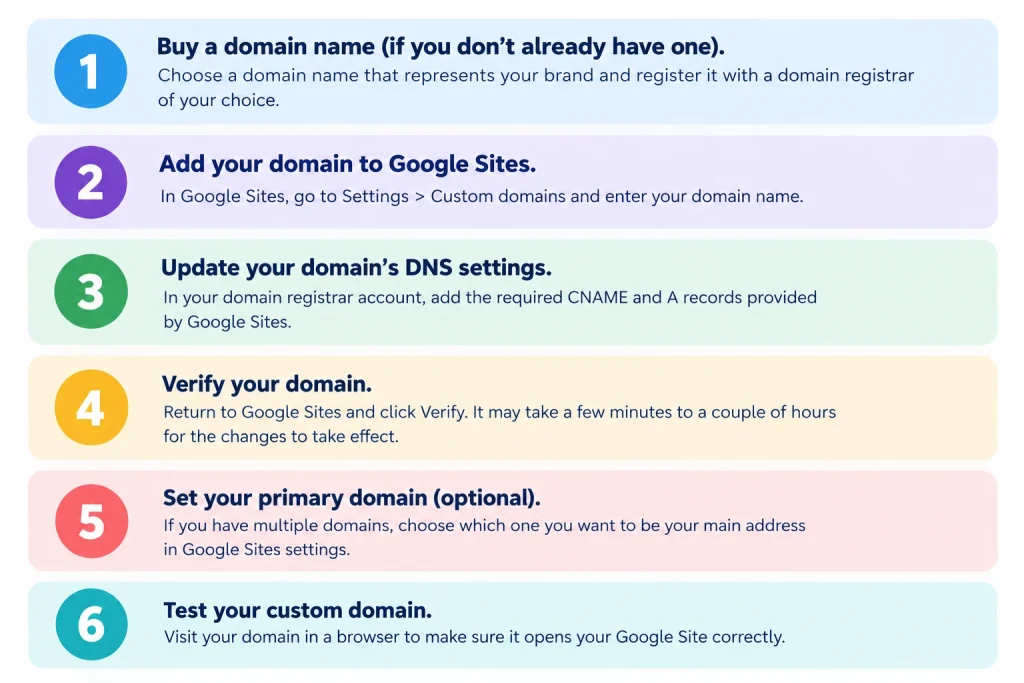
1) Verify Your Domain Ownership
Start by confirming that you own the domain you want to connect to Google Sites. Google uses domain verification to ensure that you have permission to make the requested changes. This is a separate task from assigning the domain to your site, which comes later. Verification proves the domain is yours, while the later steps tell Google which site should appear there.
Follow these steps:
- Open Google Search Console.
- Select the option to add a property.
- Choose Domain rather than URL prefix.
- Enter your root domain, such as
yourbusiness.com, without https:// orwww. - Follow Google’s instructions to obtain a TXT verification record.
- Sign in to the service that manages your domain’s DNS settings.
- Add the TXT record using the exact value provided by Google.
- Save the record, return to Search Console, and click Verify.
For the root domain, the TXT record’s host or name is commonly entered as @ or left blank, depending on your DNS provider. Use the format your provider requires.
A TXT record stores text information in DNS, including the verification code Google uses to confirm domain ownership. Do not replace the verification value with an example or remove an existing Google verification record you still need.
If verification fails immediately, allow time for the DNS change to become visible and try again. Some providers update within minutes, while others take a few hours.
2) Add the CNAME Record to Your Domain’s DNS Settings
Once your domain ownership is verified, create the DNS record that directs your chosen subdomain to Google Sites. The TXT record only proves ownership. The CNAME record is what points the www version of your address at Google. A CNAME record, short for canonical name, makes one hostname act as an alias for another, so visitors to www.yourbusiness.com are sent to Google’s servers.
For the common www address, use these settings:
| DNS field | Value |
|---|---|
| Record type | CNAME |
| Host or name | www |
| Target or destination | ghs.googlehosted.com |
| TTL | Use the provider’s default, or 3600 seconds if you can set it |
The exact field names may vary depending on your DNS provider. Some dashboards label the host field “Name” or “Alias”, and some ask for the full hostname, such as www.yourbusiness.com, instead of just www. Follow the field requirements of your own dashboard.
TTL, or time to live, is the number of seconds other servers may keep a copy of the record before checking for updates. A lower value means changes spread faster, and a higher value reduces lookups. The default is fine for most people.
After entering the record, save your changes.
Before saving, check for conflicts. If an A record or another CNAME already exists for www, review it before making changes. A hostname cannot normally have a CNAME alongside other conflicting record types. Do not delete unrelated MX records or other DNS entries needed for email and existing services. MX records control where your email is delivered, and removing them can stop you receiving messages.
If your domain uses Cloudflare, check whether the record is configured as proxied. If Google reports DNS or certificate validation problems, temporarily switching the www record to DNS only can help with troubleshooting while you verify the connection. This is not required in every setup. The correct configuration depends on your DNS provider and Google’s current requirements, so change it only if problems appear.
3) Assign Your Custom Domain in Google Sites
Now connect the verified domain to your website.
- Open Google Sites.
- Select the website you want to connect.
- Open Settings.
- Select Custom domains.
- Click Start setup.
- Enter the full address you want to use, such as
www.yourbusiness.com. - Click Next and follow the on-screen instructions.
- Complete the setup and click Done when prompted.
Make sure you enter the full subdomain, including www. Google Sites requires a subdomain for this custom URL setup; entering only yourbusiness.com may result in an invalid URL message. If you bought your domain from a company other than Google, choose the option for a domain from a third party when the wizard asks.
Once assigned, Google issues an SSL/TLS certificate for the address. This certificate is what enables HTTPS, the secure connection shown by a padlock in the browser. It can take a little time to appear after setup.
If you are using a Google Workspace account and the custom-domain option is unavailable, contact your administrator. Workspace-managed sites may require URL mapping through the Google Admin console instead of the standard Sites editor.
4) Set Up the Root Domain to Redirect to Your Website
When you connect www.yourbusiness.com to Google Sites, that does not automatically guarantee that yourbusiness.com will work too.
The root domain, sometimes called the bare or naked domain, is the address without a subdomain. If you want visitors to reach your website whether they type the address with or without www, configure a redirect from the root domain to your preferred www address. A redirect is an instruction that automatically sends visitors from one address to another.
For example:
- Preferred address:
https://www.yourbusiness.com - Redirect from:
yourbusiness.com - Destination:
https://www.yourbusiness.com
To set this up:
- Sign in to the provider managing your DNS or domain forwarding.
- Look for a feature labelled URL forwarding, Domain forwarding, or Redirects.
- Configure a permanent redirect from the root domain to the full www address.
- Save the changes and follow any instructions your provider gives you.
The exact method depends on the provider. Some DNS services offer forwarding directly, while others require a separate redirect service. A DNS record alone does not perform an HTTP redirect, so don’t assume that adding an A record or CNAME for the root domain will achieve the same result. DNS only says where to go, and a redirect is a separate web-level instruction.
5) Wait for DNS Propagation and Test Your Domain
Once your records and custom-domain settings are in place, give the changes time to take effect. This waiting period is called DNS propagation. It is the time it takes for servers around the world to refresh their stored copies of your records.
Google says custom-domain changes can take up to 48 hours to become visible across the internet, although they often work sooner.
During this period, check the following:
- The TXT record is visible and domain ownership is verified.
- The www CNAME points to ghs.googlehosted.com.
- The custom domain appears in Google Sites settings.
- The website is published and publicly accessible.
- The HTTPS version of your custom domain loads correctly.
- The root domain redirects to the preferred www address, if you configured forwarding.
You can confirm your records are visible with a free tool such as the Google Admin Toolbox Dig. Test the website in a private browser window, on a mobile phone, and on a desktop computer. A private window avoids showing you an old cached copy of the page. Also check that internal links and navigation work as expected.
If you recently changed your DNS records, avoid repeatedly editing them just because the website hasn’t appeared immediately. Wait for the changes to propagate before making further adjustments.
6) Check Your Website’s Preferred Address
Once your domain works, decide which address you want to use consistently in your marketing materials, social media profiles, and business communications. Using one consistent version everywhere keeps your branding clear and avoids splitting visitors between two addresses.
For example, if your preferred address is https://www.yourbusiness.com, use that version in your promotional materials and configure the root domain to redirect to it.
Check both versions in your browser to confirm that visitors reach the intended website. If you change your preferred address later, update your links and redirect settings accordingly.
How to Troubleshoot Common Google Sites Custom Domain Errors
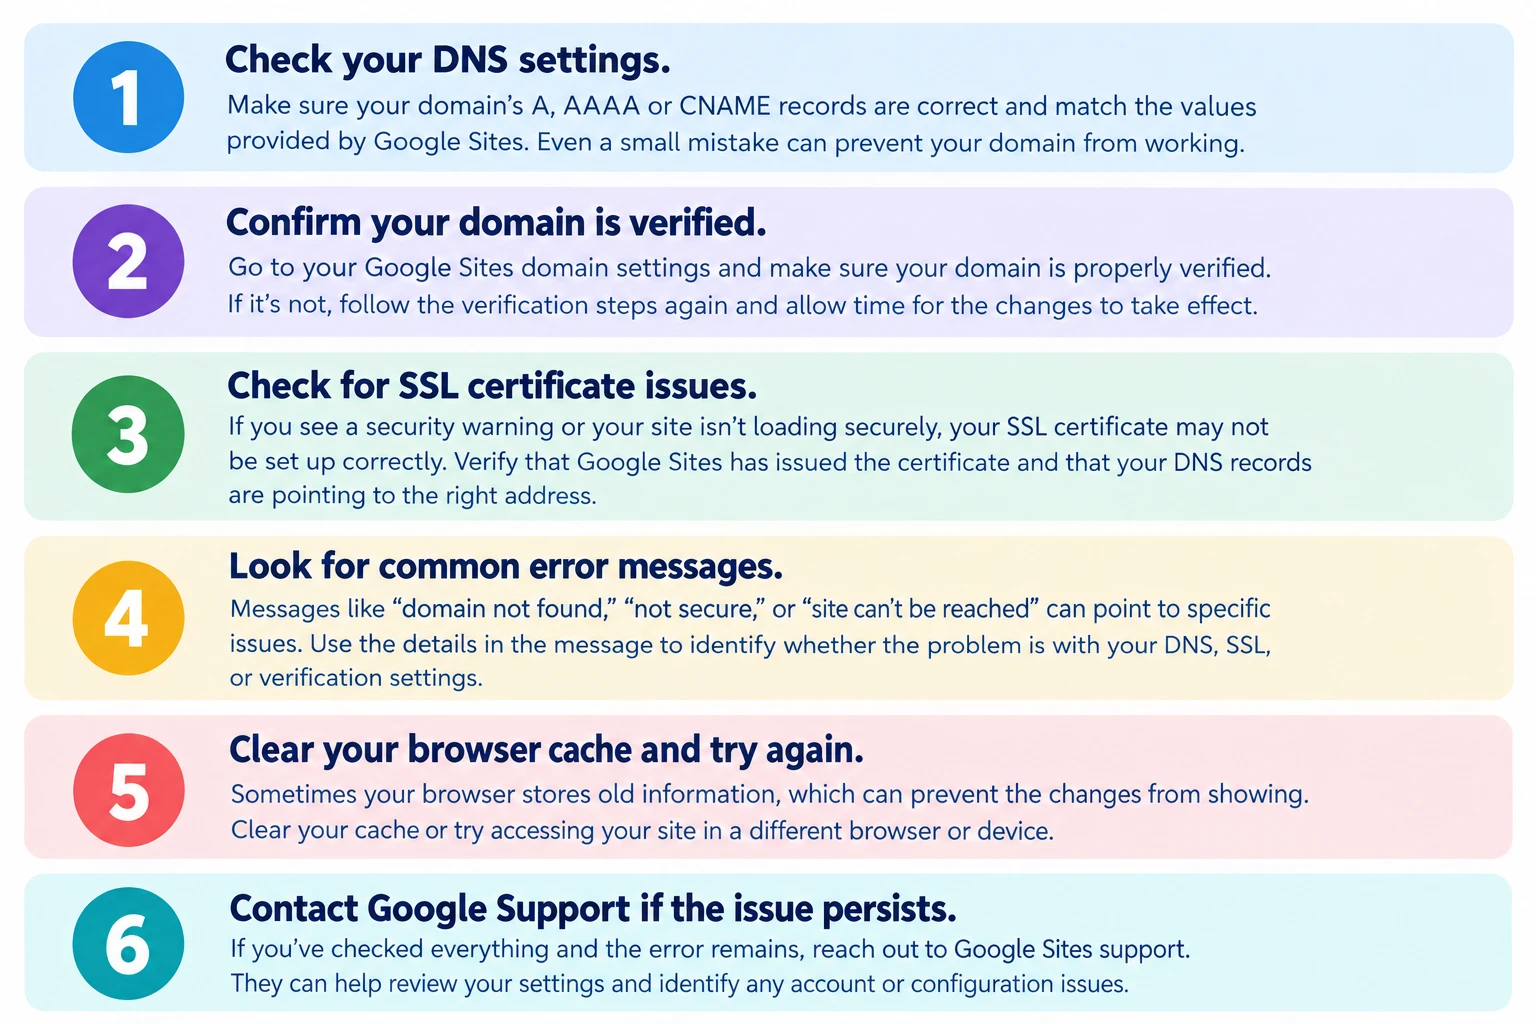
If your custom domain isn’t working, the error message can help you identify what needs fixing. Start with the message itself rather than redoing the whole setup.
1) Invalid DNS
This usually means Google cannot confirm that the required DNS record is configured correctly. The most common causes are a typo in the target, a record saved with the wrong host name, or edits made at a provider that no longer controls the domain.
- Confirm that the
wwwCNAME points to ghs.googlehosted.com. - Check that the record is saved with the correct host name.
- Confirm that you’re editing DNS settings at the provider managing the domain’s active nameservers.
- Allow time for the changes to propagate.
If the records appear correct but Google still reports an error, review your DNS provider’s certificate-related settings or contact its support team.
2) The URL Is Not Verified
If Google reports that the URL is not verified, return to Google Search Console. This message points to the ownership step rather than the CNAME record.
Check that you added the TXT record to the root domain and entered the complete verification value. A missing character or a stray space is a frequent cause. If the record is correct but verification fails, wait for the DNS change to become visible and try again.
3) The URL Is Already in Use
Google may report that the custom URL is already associated with another Google service or website. This often happens when the address was previously used with Blogger, classic Sites, or another Google Site.
Check whether the domain is already mapped to another Google Site, Blogger site, or supported Google service. If an old mapping exists, determine which service uses it and remove the previous mapping only if it is no longer needed.
Avoid removing an active mapping without checking its purpose first.
4) The URL Is Missing Its Certificate
If Google reports that the URL is missing its certificate, the HTTPS certificate may not have been issued or validated successfully. Certificate issuance can take time, so a brief delay after setup is normal.
Check that your DNS configuration is correct and that the custom domain is still assigned to the intended Google Site. Google’s guidance for this message is to remove the custom URL and assign it again, so follow its current instructions for removing and reassigning the custom URL if required.
If you are using a DNS proxy service, check its proxy settings during troubleshooting. Do not repeatedly delete and recreate records without first identifying the cause.
5) The Domain Works With www but Not Without It
This is usually a root-domain forwarding issue rather than a problem with the Google Sites CNAME. The www record only covers the www address, and the bare domain is handled separately.
Confirm that the www address works first. Then check that the root domain has a working redirect to the preferred address. If your DNS provider doesn’t offer URL forwarding, you may need a separate redirect service.
6) Your Website Redirects to the Original Google Sites URL
Check the published site’s sharing settings. Google notes that a site that isn’t shared for public viewing may redirect visitors to its original sites.google.com address.
Make sure the website is published and that its sharing settings allow the intended visitors to access it.
7) Your DNS Changes Have Not Taken Effect
If you have just updated the TXT or CNAME record, wait for propagation. You can use a public DNS lookup tool, such as the Google Admin Toolbox Dig, to check whether the new records are visible.
If nothing changes after the expected waiting period, confirm that you’re editing the authoritative DNS provider rather than a dashboard that no longer controls your domain’s nameservers. Changing nameservers is rarely the right fix and can disrupt email or other services, so look at where the nameservers currently point before you edit anything.
How to Add Google Sites DNS Records Through Truehost
If your domain uses Truehost Uganda’s DNS management service, you can add the required records through the DNS management dashboard. The exact steps depend on if your domain uses Truehost’s DNS service or another provider’s nameservers. These steps apply only when Truehost controls the domain’s active DNS.
The general process is:
- Sign in to the DNS management service that controls your domain.
- Open the domain’s DNS management page.
- Select the domain and open its record-management settings.
- Add the TXT record supplied by Google Search Console, using the required host and verification value.
- Add the CNAME record with
wwwas the host andghs.googlehosted.comas the destination. - Save or apply the changes, following the dashboard’s instructions.
- Return to Google Sites and complete the custom-domain setup.
Button and menu names can differ between dashboards and change over time, so rely on the labels you see on screen. If your domain uses a different DNS provider, make the changes there instead. Changing nameservers solely to follow this example is unnecessary and may affect existing website or email services.
FAQs
Can I connect a custom domain to Google Sites without coding?
Yes. The process uses your domain’s DNS settings and the Google Sites interface, not programming. You copy a TXT record and a CNAME record into your DNS dashboard, then assign the address in Google Sites. The main skill needed is care when copying values exactly.
Does connecting a custom domain improve my website’s SEO?
A custom domain doesn’t guarantee higher rankings, but it can help in practical ways. It gives you a memorable, brandable address that people trust and are more likely to share and link to. Using one consistent address, with HTTPS working and the root domain redirecting to your preferred version, also avoids splitting your links between duplicate addresses. Content quality and relevance still matter most.
Will my old Google Sites URL still work?
Once your custom domain is working, you should share the custom address. The original sites.google.com address may continue to exist, but a site that isn’t publicly shared can redirect visitors to it. Check your sharing settings and test both addresses in a private browser window. Update any links you have already shared.
Can I use the same custom domain for multiple Google Sites?
A single address can point to only one site at a time, so you can’t map the same full address to two different sites. You can, however, use different subdomains of the same domain for different sites, such as www.yourbusiness.com for one and portfolio.yourbusiness.com for another.
Do I need to renew my custom domain?
Yes. Domains are registered for a set period, usually a year or more, and must be renewed to stay yours. If the registration lapses, your website will stop loading at that address and the domain may become available to others. Turn on auto-renewal where possible and keep your contact email up to date so you receive reminders.
Ready to Connect Your Custom Domain to Google Sites?
A custom domain gives your Google Site a professional, memorable web address. The key is to verify ownership, configure the www CNAME correctly, assign the domain in Google Sites, and set up forwarding if you also want the bare domain to work. Knowing how to connect a custom domain to Google Sites mostly comes down to following these steps in order and being patient while DNS changes spread.
Before you finish, test the website on different devices, confirm that HTTPS works, and make sure you haven’t disturbed DNS records used by email or other services.
If you still need a domain name, explore Truehost Uganda for domain registration options for your online project.
